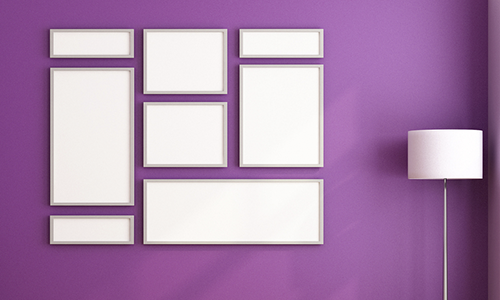
No family room or entertainment space is complete without a focal wall. For some focal walls, a built-in fireplace stands as the testament of strength and warmth. But other walls often don’t have a natural focal point. In those cases, a photo collage is a great way to give personality and pizazz to an otherwise bland wall. In creating a photo collage, you’ll also bring a great design element to the room and display memories that will make you smile each time you see them.
If you’re ready to start building a photo collage of memories on your focal wall, follow these steps:
- Choose Photos – With hundreds of photos to choose from on your computer, this may be the most difficult part of a photo collage. Luckily, most collages include a larger number of photos. Depending on the size of your wall, you can start with somewhere between 5-15 photographs.
- Eclectic: If you include fewer photos, you can enlarge a couple to stand out. This method ensures a collage of varying sizes and shapes of photos.
- Refined: For a more refined appeal, you can design your collage to include photos of the same size, shape, and orientation.
- Stop by Frame Warehouse – Frame Warehouse professionals can guide you to find the right frames to match your project and personality.
- Eclectic: Select frames of to fit the various sizes of photos you’ve chosen. The size differences themselves can add enough variety, but you may also opt for frames of different colors and materials – dark and light wood, black plastic, antique finish, ridged or smooth.
- Refined: The frames should match in at least one way, whether they are the same color, material, or texture. There should be some unifying factor.
- Shop for Jazzy Little Extras – Whether you are leaning toward an eclectic or refined photo collage, shopping is the best part! You can add class and/or personality with other wall decor. For instance, you could center your collage around a wooden block letter (the first letter of your name), an inspiration or affirmation quote, mirror, or metal flower.
- Block Out the Collage on Your Wall – Before hanging and putting holes in your wall, plan out your collage! One of the quickest and easiest ways is to trace your photos onto old newspaper, cut out the shapes, and arrange them on the wall. Be sure to use a tape that is gentle on paint or wallpaper so that you do not damage the wall by sticking and removing the newspaper cutouts. This way, you can also move the shapes around and step back to test out different collage looks.
- Eclectic: Stagger the newspaper shapes on your wall. Spiral the photos away from the center or create “rays” of photos in lines extending from the center. Be creative!
- Refined: Line up your newspaper shapes in rows and columns to create a larger straight-edged shape: square, cross, rectangle, etc. Use a ruler and leveling device to ensure measurements are maintained and symmetrical.
- Hang Time! – You’ve done the grudge work, now see the results! Hang each photo piece by piece, replacing the newspaper shape with the framed photo to which it corresponds.
Your hard work is complete and your focal wall looks fabulous! But as the years go on, you’ll probably want to switch out a few photos or even add some to the outside edges of the collage. Remember Frame Warehouse for all your framing needs! The framing experts guarantee quality and unmatched service so that your photos and artwork dress up your home for years to come.


