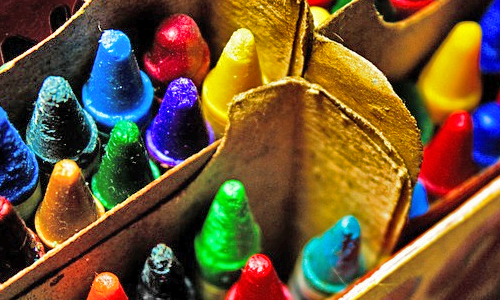
Crayons have long been the go-to art utensil for children around the world. You probably have childhood memories of an open notebook and crayons spread out over a table in no particular way, laying exactly where you threw them down to hurriedly grab another and another. And maybe you even have children or nieces and nephews that bestow you with their masterpieces of scribbled color. The excited frenzy that you see in the art of children and once felt yourself can be relived in a unique DIY crayon art design!
This project is not your typical crayon design on coloring book pages, but rather a more adult version that harnesses the playful energy and creativity of crayons.
What you will need: canvas (any size), basic paint set and paint brush, Crayola crayons, blow dryer
Follow the steps below to create a modern color splash design with crayons!
- Gather Materials – Decide on the size of canvas you want, depending on where you plan to hang the finished piece. The size of canvas will be a good indicator of how many crayons you will need; you want to try to cover at least 50% of the canvas with color. The paint can help fill the empty spaces and add to the design, but don’t rely on the paint to be the focus point.
- Decide on an Image – Your piece should have a cohesive idea. The idea could be as simple as a color pallette or as complex as an image, such as a tree. Decide where in your image you will incorporate splashes of crayon color. For a tree, the crayon splashes could be groups of leaves – great for the changing fall colors look!
- Melt Crayons – Unwrap the crayons you have chosen. Using a fork or tweezers, hold out the crayon over the canvas. Turn the blow dryer on the highest heat and point it downward over the crayon and toward the canvas. As the crayon melts, the color will splash across the canvas. Repeat this with several dozen crayons of varying colors. The splashes can be isolated or overlapping.
- Add a Splash of Paint – This is the step that pulls the whole idea and image together. Did you imagine the color splashes as groups of tree leaves? Then add brown paint extending down from them like a tree trunk. If you were just experimenting with isolated splashes of color, you could add green stems and turn them into abstract flowers. Or just play around with paint shapes and outlines over the top of the crayon splashes for a more modern graphic look!
- Finish – The crayons must cool in order for the color splashes to harden into place. The paint must also dry. Once enough time has passed, you may choose to add a spray finish to keep the colors from running or smudging further.
Have you been looking for a simple art project for Sunday afternoon? Or maybe you need to dress up your apartment for a showing? This DIY melted crayon design is a fun solution to suit your boredom and decoration needs! And best of all, it’s inexpensive and doesn’t take intensive art skill. Once you’ve finalized the piece and are ready to display it, head over to Frame Warehouse to choose the perfect finishing frame.


