Thumbtack Art

thumbtack art

Everyone enjoys repurposing office supplies for the sake of art, and who hasn’t played with thumbtacks on the office idea board? Thumbtacks are actually a very versatile art medium, able to recreate art as complicated as a portrait or landscape through the theory of pointillism. Pointillism uses small dots of color and apply them to patterns that form a larger image.


While some artists choose to paint the heads of the thumbtacks specific color shades for more complicated pieces, our thumbtack art will require much less intricate detail while still maintaining that modern art flare. The following steps will help guide you in creating a one-of-a-kind thumbtack art design:


  1. Choose the Right Supplies

While you can use thumbtacks with tall, plastic heads, we recommend finding the kind with flat, metal heads instead. Metal thumbtacks are easier to work with and more durable. They will ensure the longevity of your design. In addition, metal thumbtacks have a subtle antique aesthetic that plastic thumbtacks lack.


A box frame canvas is likewise recommended for this project, as you will be reinforcing the back with cardboard. In the case of adding color to your canvas, you will also need spray or acrylic paint.


  1. Build Your Design

This is the most important step in the creation of your art piece. Sketch your design onto a piece of paper that is cut down to the exact size of your canvas. Graph paper is nice to use if your design includes words, as it can ensure level and same-sized letters. Cursive and foreign characters work especially well. If you are more artistically inclined, sketching a picture is also okay. Be aware that you will be replacing the lines with thumbtacks, so any kind of shading or more intricate lines may be difficult to convey. Simplicity is key.


  1. Prepare the Canvas

Your thumbtack design may look best on a white, unaltered canvas. However, it is more likely that a little bit of color will enhance your overall design. Consider what color your thumbtacks are; just about any color will work with silver or gold metal thumbtacks, so choose your favorite color or the color that goes best with your current decor! After you have chosen a color, spray paint your canvas and allow to dry. If you would prefer, you can paint the canvas with acrylics instead.


Reinforcing your canvas requires enough cardboard (in pieces or as a whole) to lay across the entire back surface of the canvas. Adhere the cardboard with brown packing tape or blue painter’s tape, whichever is available to you. This will give the thumbtacks something more sturdy to grip than the canvas alone.


  1. Imprint the Design

Lay your paper sketch over the top of the painted canvas. Secure it in place and use pressure to retrace the lines. The pressure will create an imprint in the canvas. The imprint doesn’t need to be easy to see. As long as you can follow the lines, the imprint is strong enough.


  1. Make an Impression

Remove the paper sketch and start tacking! Press each individual tack into the line impressions formed on the canvas, as close as they can be without touching. Don’t press them in too hard or the stretch on the canvas might “erase” the rest of your impression. Instead, wait until all of your design is tacked before ensuring they are pressed in firmly.


Way to harness your industrial art side! Now, it’s time to hang up your finished piece in your home or office. But before you do, consider Frame Warehouse for the perfect frame to showcase your work!

Lip Print

lipstick art

Sure, you’ve heard of leopard print and zebra print designs – but what about lip print? It’s far more unique and striking than your standard animal prints. After all, women are the most dangerous and exotic animals in the world. And what better way to add some sexy spice to your dorm room, bathroom, or even a salon?


For this art project, you will need a canvas or paper background, your favorite shade of lipstick, and most importantly – YOU! Feel free to invite friends. It’s a great sleepover or bachelorette party craft. And guys are welcome to join in, too!


  1. Choosing a Background

Depending on your budget and what you might already have at your disposal, you can choose any material for a background that you desire. Canvas board will hold up the best, but white paper will make the lipstick color pop more. If you use a simple piece of printer paper, you can test out a bunch of different colors and patterns at little expense to you. In fact, even if you choose to use canvas, it’s recommended to test out your lip print on the printer paper beforehand.


If you want to try something a bit less typical, purchase a sheet of clear plastic to use as a background in combination with a glass frame. That way, the color of the wall behind the lip print will be the backdrop for your creation. It will look as if you have kissed the glass frame or wall directly.


  1. Discovering Your Color Palette

Color is key. A lip print piece is ideally a bright and spunky design. Choose a background color that suits the lipstick color of choice. If you choose to apply multiple lipstick colors, make sure that all of them are complementary. The best result may arise from shades of the same tone. For instance, “blazing red” and “flaming orange” might suit each other in theory, but not on paper.


If utilizing a canvas, paint your chosen background color on the canvas and allow to dry. If utilizing paper, you should be able to find paper of your color choice. Black is not recommended. White or pastel pink works really well.


  1. Puckering Up

“Put your lips together like this and kiss.” – Sebastian from The Little Mermaid


Now for the fun and flirty part! Apply your lipstick a little bit thicker than normal. Instead of blotting the excess, pucker up and kiss your background canvas or paper. You may have to re-apply the lipstick after one or two kisses. You can choose to apply your lip print in a systematic pattern and try to make each kiss identical across the page; you can create chaotic spiraling patterns; or anything in-between! Give it to your honey or keep it for your own boudoir.


Once you are satisfied with you final lip print design, it’s time to clean up your materials and head to the store for a frame. Whether you need a simple frame or a transparent glass frame for your lip print, Frame Warehouse has the expertise to finish off your art project! Just remember to clean off the excess lipstick on your lips before you make the trip.

Displaying Musical Instruments

Guitar framing

There are many reasons you might want to display a musical instrument in your home or office. Perhaps your office itself is a music studio or maybe you are a band teacher at a local school. Did you or someone you know have a musical career? Do you proudly collect priceless musical treasures throughout history? Has music touched your life in a way that can only be expressed with a cherished piece of art?


If you desire to display your personal musical instrument or memorabilia for any space, take a look at the following tips:


  1. Consider the Space

Framing a whole musical instrument such as a guitar or trumpet might strike you as a fantastic idea, but this kind of project requires the right space. Unlike a painting and most other framed art, an instrument is 3-dimensional and can be very large. The framing of the piece may require something that looks more akin to a box than a typical flat frame. With that in mind, a music studio or small office may be better off with something smaller or flatter.


If you believe the piece will fit, experiment with the idea of wall placement. For instance, hanging it over a seating area or near a door at head height may cause your art admirers to sustain concussions.


  1. Fit the Purpose

Is the final piece for you or someone else? What is the decor of the chosen space where it will hang? Will you ever want to play the instrument again?


Framing something of an instrument’s magnitude and dimensions is more complex than framing canvas, etc. While a frame can be taken apart, a custom frame will not be as compliant. The instrument or memorabilia to be framed will not be accessible for everyday use. At the same time, it will be much better protected from dust, moisture, etc.


  1. Is Less Truly More?

While the idea of framing a whole musical instrument can be unique and beautiful, you might realize that it is not practical in the provided space. Or, if it’s a gift, you may not know if the recipient has the space for it either.


A great alternative to framing an instrument is framing a piece of one, something to represent the larger whole. For instance, instead of framing a whole guitar, you could frame and retire a few of your favorite picks. Instead of framing a snare drum, you could frame a pair of crossed drum sticks. You could get more creative with this idea, arranging the sticks, picks, strings, or a combination of musical instrument components into your name or the name of your favorite band.


  1. Matting Design

The mat behind the instrument or design should compliment the spirit of the piece. A contrasting background can enhance the 3-dimensional nature of the instrument. Black and white mats are sharper and more professional, but colored options bring more character to a boring wall. Another mat option is to use musical score paper.


  1. Plaque

If the musical instrument or memorabilia holds some significance, consider having a small plaque engraved with the instrument brand, who played it, what year or band, and any other way it’s significant. This way, admirers will know its story and meaning.


After you have assembled and arranged the pieces (musical instrument, mat, and plaque), all it needs is the perfect custom frame. Take the project into Frame Warehouse for a professional mounting and framing service. The experienced staff can help you complete your note-worthy vision.

Homemade Scrabble Tile Collage

scrabble art

Do your hobbies include reading, filling in countless crossword puzzles, and challenging your friends to an intense game of scrabble? Do you want to add unique character to a wall in your home or office? If you answered ‘yes’ to one or both of these questions, then this art project is for you!

Many home decoration pieces utilize the strength of words to portray a sense of family, welcome guests, or display the simple love of words. This project enhances the idea by putting the art directly into your hands. So gather those unused scrabble tiles and put them to use in a creative way – building a word art collage.

STEP 1: Choosing Words

You might be creating this piece for yourself or a friend who loves words, writing, and reading. It makes a great gift idea for teachers or someone from the office. Or maybe you just think it’s a unique way to decorate. In any case, the first step is deciding who the piece is for, where it is going to be hung, and which words to create. For example, if you plan to hang it by your front door, perhaps you could use the words “welcome” and “greetings.” For a teacher, you might choose “apple,” “desk,” “student,” and other appropriate words. For an office, inspirational words like “endurance” and “loyalty” might be best. In a home, you could use the names of your family members. No matter the theme, choose between two to five words to use. Keep in mind that these must cross in a crossword or scrabble pattern, so including a few longer words gives more options for the word layout.

STEP 2: Gathering the Scrabble Tiles

For this project, you will need scrabble tiles. These can be obtained from buying a cheap copy of the board game from stores or yard sales. If you have the tools and knowledge, you could also cut wooden pieces from flat plyboard and use black paint to replicate scrabble tiles. By choosing this method, it’s possible to create tiles of any size. It is recommended that they be no larger than 2×2 inches if it is your intention to frame the final product.

STEP 3: Positioning the Scrabble Tiles

Begin by laying out your tiles in the chosen words. They can be vertical and horizontal but not diagonal. The words should be able to cross in at least one perpendicular pattern. For instance, “welcome” could share its first “e” with the second “e” of “greetings,” thus “greetings” could lay vertical crossing through the horizontal “welcome.” Try to center the words on your piece of paper, cardboard, or canvas. You may mark the approximate placement of the letters with x’s where the tiles sit so that you may glue appropriately. (Centering and marking the placement are only necessary if adhering the scrabble tiles directly to your backdrop. See STEP 4 for options.)

STEP 4: Adhering the Scrabble Tiles

The simpler method of adhering the tiles consists of using a spray adhesive to permanently glue them in place on your sturdy piece of cardboard or industrial paper.

The more versatile method includes adhering velcro to your cardboard, paper, or canvas so that it acts as a backdrop to your tiles. Detach the opposing side of the velcro that is not adhered and cut it into squares matching the size of your tiles. Adhere these velcro squares to the tiles. Now you may velcro the tiles to the velcro backdrop in your chosen design. This method gives you the option of switching out the words and changing the design to fit your mood, the space, holidays, etc.

By embracing words in home or office decor, you can add inspiration, emotion, and character to a space. And what better way to accomplish this idea than being in control of the words and design in a do-it-yourself project? The scrabble tile collage is inexpensive, unique, and relatively easy to create. Finish off your masterpiece with a frame chosen by the experts at Frame Warehouse. We’ll work with you to choose the perfect frame to complement both your work and your existing decor.

Repurposing Old Fabric into Modern Art!

framed fabric art

A closet can sometimes get a little cluttered. It’s difficult to throw out that lucky business tie or the bridesmaid dress collection, and so we often keep gathering until space runs out. Or maybe the favorite pair of jeans has worn through in certain places and is no longer wearable, but parting with it would be such sweet sorrow that you decide to leave it folded in a drawer. If you find yourself in this scenario, consider putting those old and unworn pieces of clothing into a fun art project!

Utilizing old fabric can be as simple as folding up and matting a beautifully printed scarf, or as detailed as cutting shapes from the fabric. In this tutorial, we will show you how to create a modern art fabric homage to those clothing items you just can’t throw out.

STEP 1: Finding Material

You can use any fabric, from tulle to jean. Make a decision about where the finished piece will be displayed and choose colors, textures, and patterns accordingly. Have a fair selection of fabric items with varying textures and patterns to try. Best results occur with bright hues and similar fabrics.

STEP 2: Cutting

It’s best to designate a box or bin for fabric scraps, because hopefully you will have a lot of them to choose from! Determine before cutting if the fabric requires ironing to be able to lay flat. Once the fabric is prepared, cut the item into strips approximately 1-2 inches wide. The width does not need to be measured, and the widths of fabric can vary. However, it is recommended to have no more than two width sizes.

STEP 3: Preparing the Background

Find or cut a piece of cardboard with at least a 1’ x 1’ area. If the cardboard product is not a desirable color, consider painting it. White works well as a backdrop for your fabric. The darker the color, the more difficult it may be to see your finished design.

STEP 4: Application

Coat the cardboard with spray adhesive. Lay strips of your fabric in horizontal, vertical, and diagonal lines across the cardboard, and press down firmly. Depending on the size of the cardboard, it may be best to use only two or three fabric strips or to use as many as ten. Using minimal fabric typically turns out better than overusing and cluttering your design. If the fabric strips are too long, cut away the excess on either side. Allow the piece to dry.

Voila! You have now immortalized that lucky tie into a modern art masterpiece. Or maybe you have created a way to display the memories of past bridesmaid adventures. Keep your unused scraps for future projects and creating modern art to give as gifts. Of course, the piece wouldn’t be complete without the proper frame. Take it in to Frame Warehouse to find the frame which will compliment the colors and give your creative memories that special touch!

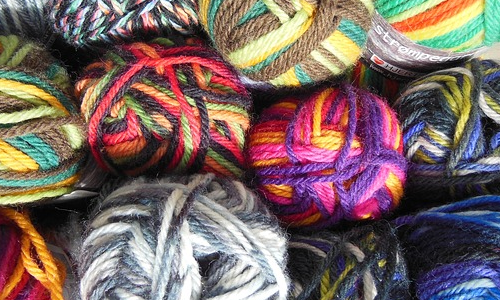
Creating a Stamp Art Print with Yarn

stamp art with yarn

Stamping is a simple and efficient way to create a modern art print for your home or office. More importantly, it’s fun!

Yarn stamping is one of the least expensive and most precise techniques to add a little more pattern to the typical stamping idea. Because of the simplicity and cost effectiveness, it is also a great family project. Kids of all ages enjoy playing with colorful paint, and parents can proudly hang the resultant pieces. Spice up a boring wall with this classy do-it-yourself modern art project!

STEP 1: Choosing the Body of Your Stamp

Yarn will determine your stamp’s pattern, but the body of the stamp determines its shape. For instance, during Christmas the body of your stamp might be a Christmas tree. Or for every day, the body of your stamp could be a simple square. Many stamping techniques use a wooden block as a stamp body, but you can also cut out a cardboard shape or find something else to wrap the yarn around. (Keep in mind, the body of the stamp will get paint on it.)

STEP 2: Adding Yarn to Your Stamp

Now that you have selected a stamp shape, it is time to design your stamp pattern. Simply hold one end of the yarn against the back of your stamp with your thumb. Wind the yarn around the stamp tightly. As you wrap the yarn around the block or cardboard, allow it to deviate slightly from simple vertical lines. When you look at the bottom of your stamp, it should have some lines of yarn that cross paths. When you are satisfied with the pattern, tie the yarn off on the top and tape it in place.

STEP 3: Applying Paint to Your Stamp

Choose a bright color (or few colors) of paint. Dip your paintbrush into the paint and begin by lightly sweeping the paint over the bottom of your stamp. Apply the paint in only one direction so that the fibers of the yarn lay to one side. If the paint covers the body of the stamp as well as the yarn, you are applying the paint too thickly. Rinse off, blot dry, and try again. The paint should cover the yarn but nothing more. Test the stamp by pressing it into a scratch piece of paper. Does the pattern stand out? If the pattern is clear, you can begin stamping.

STEP 4: Stamping

Using the correct amount of paint and pressure, press the stamp onto a clean sheet of paper or canvas. You can do this in a systematic way such as rotating the stamp 90 degrees for each time you stamp it, measuring out the distance between stamps, etc. Or you can stamp the pattern more chaotically, with overlaps and no set system. In this way, you will achieve clusters and additional shapes, almost like an inkblot image.

Whether decorating for a holiday, adding style to a wall, or just looking for a creative outlet as a family, yarn stamping is a simple and fun method to create a modern art print. When the paint dries and you decide where to hang your one-of-a-kind creation, don’t forget to add a complimentary frame. Frame Warehouse can work with you and your style to add the perfect finishing touch to your inspired design!

Framing Considerations

framing

Choosing a frame for your favorite new piece of artwork can be a challenge. With thousands of choices, it may seem overwhelming at times. At Frame Warehouse, our knowledgeable staff are available to help you choose the perfect frame for your next photo or painting. Professional framers can help guide you through the process and you’ll leave knowing you’ve picked the perfect frame to compliment the artwork, your decor and your budget. These three aspects of the framing decision are addressed during the process. Learn more about how Frame Warehouse can assess and provide the best framing experience possible below.

  1. Artwork: The first thing to consider when choosing a frame for your newest piece of artwork or photo is the content in the artwork. From a contemporary black and white photo to a more traditional oil painting, a frame can compliment and enhance a piece. The experts at Frame Warehouse have the knowledge and experience to help narrow down the search to make choosing a frame a simplified process.
  2. Decor: Determining what room a piece will hang in will help to determine the aesthetic feel of a frame as well. Of course, the content of a piece will also play a role in it’s placement. From dining rooms and kitchens to bathrooms and family areas, different feels will determine not only the types of work but the look of the frame as well. Already have a style of frame in mind? Let our professional frame makers know and we will work to find frame options that compliment your current look and feel.
  3. Budget: From high end to more modest pricing options, Frame Warehouse has a wide variety of frames for all budgets. Share this information with our professional framers and they will work with you to find frames that are both beautiful and affordable.


Looking for an entire room of framed artwork or just a piece or two? Frame design consultants can help you choose the perfect frame and can also assist with custom frame design using the wide variety of inventory at each Frame Warehouse location.

A piece of artwork’s frame can bring new look and a completed feel to the piece and the room it resides in. Bring out the best in your art, photography or memorabilia by visiting the framing professionals at one of our 16 Frame Warehouse locations. Each location is staffed with experienced, professional craftsmen and women ready to help you finalize your next framing project and complete the look and feel of your home. Find the location nearest you, here.

Glass for your Framing Projects

One of the most important choices you will have when you choose to have custom framing done, is the selection of glass. Frame Warehouse offers 5 choices in glass.

How do you decide what glass is best for your project?

  1. The value of the piece – Only you can assess how valuable something is to you. Some items may not warrant the investment in museum-quality glass when there are more affordable options available.
  2. How much glare you are willing to tolerate? If your art is near a direct source of light such as a window or lamp, it may reflect more glare and a non-glare or glare reducing glass may be beneficial. Certain images, typically those with dark backgrounds, are also known to create more glare.
  3. Consider the need to preserve the piece from ultra-violet rays that can harm your artwork. They are particularly harmful to organic material found in certain paint, ink and papers. UV rays create irreversible damage which is why archivists, museum curators and preservationists everywhere prefer museum quality glasses that prevent yellowing, fading and the breakdown of organic material.

Frame Warehouse offers Tru-Vue® Museum Glass, a truly extraordinary product. It provides the same UV blocking protection as Conservation Clear® and Conservation Reflection Control® two less expensive glasses. In addition to its ability to block more than 98% of ultra-violet rays, Museum Glass has an anti-reflective surface far superior to a typical non-glare glass.

A special coating is used in extremely thin layers to break up the incoming light rays so that they don’t bounce back off the glass, producing a glare. Because the rays don’t bounce, the picture is actually more illuminated than with clear glass. Clear glass transmits 91% of light to the artwork, while Museum Glass transmits more than 97% of light to the artwork. This improves color intensity and clarity.