How Can Frames Add a Pop of Color to Your Home?

How_Can_Frames_Add_a_Pop_of_Color_to_Your_Home_(Image)

Color in the context of home décor is fascinating because it can say so much about who you are. Your style is reflected in the color palette you choose for your home, and there’s no better way to put this color palette on proud display than through frames. While frames are available in a long list of colors, you can use frames in unexpected ways that clearly showcase your personal style. The following are some fun ways to transform your frames and create unique pieces of décor.

  • Give your frames a makeover with a fresh coat of paint. Nothing pops like a brightly colored frame on a white wall. If you’re starting from scratch in the color department, it’s a great idea to visit your local paint store and use paint chips to create the perfect color palette for your home. If you already have a color palette in place, choose hues that fit with your current scheme. Painting all of the frames on a gallery wall one color, whether it’s a bright, bold hue or a more subdued one, is a chic way to use color in your space. Want a little more personality? Pair complementary colored frames hung in a pattern.
  • Remember: metallics are colors, too! Metallics are on trend right now, and there’s no better way to keep your frames fresh and your home décor up to date than with a can of spray paint—or with a trip to Frame Warehouse. Rose gold, gold, copper, and silver are all wonderful metallic options. Choose the one that fits best with your home’s current color scheme.
  • Play with color within your frames. Colorful mats are a playful way to bring a pop of personality into a room. Want a crisper look? Try all white frames with white mats and graphic, bold art pieces. While your frames will slide into the background, they’ll let the colors in your favorite art pieces really shine.

We’d love to see your finished work! Send photos of your colorful frames to Frame Warehouse on Facebook.

Add Wall Frames to Your Empty Hall

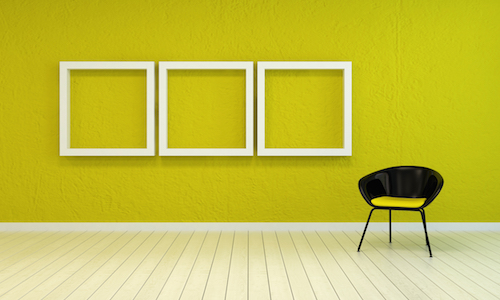
3D Rendering of Colorful modern art gallery interior with three empty white wooden picture frames on


All homes have that awkward empty wall or hallway. It’s sometimes by the back door, the basement, the bathroom hallway, or in an oddly shaped nook where furniture will not fit. To add personality and flair to that corner, it’s time to hang some frames! The key to decorating the blank wall is to avoid overdoing it. It should be subtle flair that adds personality, but isn’t overwhelming.


We are all guilty of going overboard when it comes to wall decorations. We tend to think that to enhance the space; we need to fill it up entirely. This simply isn’t true. Decorate your blank wall using a minimalistic approach. Doing so will draw attention to the specific pieces of art that you choose; it won’t clutter the space with random space fillers. How does one approach a free space minimally? There are several techniques, but the easiest and the best way is the “rule of three.”


The Rule of Three

  • A common approach of minimal decorating is the rule of three. The rule of three can be perfectly and easily applied to your empty hall or awkward blank wall. To achieve the rule of three, choose three identical frames. Depending on the space, larger can be better. With your chosen frames, pick art that three different pieces of art that are similar in aesthetic or them. These three art pieces should also accentuate the frame.
  • Now that you’ve chosen your frames and the art that you want to show off, it is time to hang them. Hang the frames at eye level. This means that when you stand a comfortable distance away from the fame, you should be able to look at the center of the art.
  • At an eye level, the art should be centered on the wall. Take the frame that you want to have in the middle of the wall and hang it appropriately measured in the center. From there, measure and the same distance on each side of the frame. These two marks will be where you want to hang your other two frames.
  • With your frames centered and evenly spaced, your blank wall will have a tidy and chic aesthetic that is attention grabbing, but not overwhelming.


To choose frames that match the atmosphere of your home or to find frames that can accentuate your art, visit our website. We have over 80 frame styles online. Visit one of our sixteen locations and talk with our skilled team. They can help you visualize and create your personal framing projects.


Take the Perfect Family Photo for Holiday Cards

framed family photos

A perfect family photo is a challenge! When there are several people in one photo, it’s difficult to get a picture where everyone looks good and has a nice smile. Family photos are the best part of holiday cards, so getting a good picture is important. Remember these five helpful tips when you set up your next family photo session.


Equipment

  • Avoid using your smartphone if possible. They take clear pictures now, but they do not have the same quality as an actual camera. Digital cameras account better for lighting and have a higher megapixel count.
  • Use a tripod or set up something to set your camera on. You don’t need a full duty tripod and camera set up, just set your camera on a level stack of books. As long as everyone is in the photo and it’s at a flattering angle, you will have a good photo! No need for fancy equipment.


Place

If you can, take your photo outside with natural lighting! Go to a place with a scenic background, or take the photo at a special place that your family likes to visit! If not, place lights behind the camera but facing toward the family in the photo. Doing so will help highlight their faces.


Poses

  • Try a variety of poses to find the best one. You can do funny faces, straight faces, cheesy smiles, or a photo that highlights each personality! Highlighting individual personalities is a fun one. Have your family make their “normal” face or the faces that they think describes their personality best! You’d be surprised the types of faces you’ll end up with.
  • The goal with the poses is to make sure everyone looks relaxed and comfortable. It’s easy to tell when people are stiff or nervous in a photo! Try to keep the photo session light-hearted and fun.


Editing

The great part of the digital camera is the ability to edit the photo! After you find a good picture, where everyone like the way they look in the picture, you can make minor adjustments to improve the lighting and clean up any blemishes in the photo! You and your family will be looking picture perfect!


Implementing these tips will help you take a great family photo for your holiday cards! You may find that you like the photos enough to print one and frame it! If that’s the case, contact Frame Warehouse. We can help you find the perfect frame for your home decor and photos.


How to Use Frames as Wall Art

framed art

Blank walls can make a house feel small and empty. To make a house feel homey, fill those blank spaces with frames! Use frames to personalize your home, display photos and art, and create a different atmosphere in each room. Here are some ideas to stylize your home using frames as wall art.


Frame Styles

Consider the space that you are trying to fill. Is there a blank wall in the bedroom, bathroom, kitchen, dining room, office, or living room? Each room has a different personality.

  • For the bedroom – Pick frames that accent your bedding and furniture. Try to pick frames that have a relaxing look. Don’t pick big, bold, loud frames. Instead, hang frames that are easy to look at.
  • For the bathroom – Pick frames that accent the existing colors in your bathroom. For example, you can pick an accent color from the shower curtain and use that color for your bathroom frames. If your bathroom is themed, you can choose frames that match the theme. Perhaps you have a beach theme or lake theme in your bathroom. Choose a simple frame and add seashells to it, or pick a frame that has a sandy texture for a quick and elegant update.
  • For the kitchen – Kitchens are warm and inviting. Pick frames in warm colors like rich reds, browns, and burnt orange. Frame your favorite recipe, baking measurements, or quotes about cooking. You can also frame pictures of your family baking.
  • For the dining room – Dining rooms also have a warm and inviting feeling, but can be decorated in a more sophisticated way! Add personalized touches with dark frames filled with family photos and fond family memories.
  • For the office – In the office, utilize frames that inspire creativity. Frame quotes that motivate you to complete your work, reach your next big idea, and help you stay focused on your goals. Use frames that are simple, but that accent the atmosphere of the space.
  • For the living room – The living room is where you can experiment the most with different frame styles. The living room is used for so many different things: movie night, family night, extra space, lounging, napping on the couch. Make your living room feel comfortable and cozy by using textured frames with a warm hue. For great conversation starters, frame your interests, mementos, and family photos.


Frame Tips

  • To create a different feel, try using a variety of frame sizes.
  • Create frame clusters for a unique way to fill a blank wall.
  • Implement different frame textures for a creative and kitschy feel!
  • For a chic and clean atmosphere, use smooth frames of the same size and align them, perfectly-spaced on the wall.


The main goal is to make your home feel comfortable to you! Frames are a great and affordable way to create the atmosphere that you want in your home. Contact Frame Warehouse for frame options!

5 Reasons to Hang Frame Creations

framed photo wall

Wall decor can make any ordinary house a home, but standardized art from a big box store is not the best way to decorate. The best way to decorate your home, add personal touches, and create a unique atmosphere is to hang your crafty frame creations. Here are 5 ideas and reasons to create custom framing projects.


Frame Photos

The easiest way to create a personalized home is by framing photographs. Make frame collages with old family photos, baby pictures, and family quotes. You can put these frame creations on any wall, in any room of the house.


Frame Memories

Another great way to add uniqueness to your home is by framing and displaying memories. To do this, you can frame concert tickets and photos from the concert. You can frame a memento from your first date with your significant other with a picture of the two of you. You can create a frame collage of your child’s birth. Frame their hospital outfit, an ultrasound photo, and a picture of you in the hospital with your newborn. You can make a frame creation of your first family vacation! Remember the little details of your trip by creating a collage of photos, event tickets, wristbands, and funny quotes that were said.


Frame Your Hobbies

A great way to personalize your home is by framing your hobbies and personal interests. If you’re a cinephile, frame posters of your favorite movies. Audiophile? Frame the vinyl that changed your life. Sports fanatics, frame your team jersey, your lucky hockey puck, etc. If you are a shutterbug or a painter, frame your work! It is a great opportunity to display work that you are proud of. Framing things that are of interest to you is a good way to express your personality and your hobbies. They are personal and unique pieces that you won’t find in any other home!


Conversation Starters

Photos, memories, and hobbies are all excellent conversation starters. When people come to visit, you will already have a variety of topics to talk about, simply due to the decorations in your home! It is a great opportunity to find people with mutual interests and experiences to bond with.


Not generic

The best part about customized frame creations is that no one else has the same thing. Your decorations will be personalized to you and your family. Customized frames have a unique quality about them. They will make any house a comfortable home.


Frame creations can be made easily with materials from Frame Warehouse. Check out our website for over 80 styles of frames! We offer art gallery materials at warehouse prices.

How Frames Can Accentuate Your Art

framed artwork

To frame your art or not to frame your art can be one of the most challenging room decor decisions. Some speculate that frames take away from the focus and attention of the art, others say it can accentuate the artwork while demanding the attention of your eye. We believe frames are a great way to accentuate and protect your art, while adding harmony to your home.


Frames demand the attention of your eye

It is true! With a frame, your art will be acknowledged by anyone you welcome into your home or office. Frames are used to draw attention to photos and art that you want to be seen.
Frames help your art stand out from its surrounding and be a focal point for the room.


Frames add harmony to your home

With frames that share a theme, you can show off a variety of art and photography without your decor feeling mismatched or messy. Frames will helps connect all the different art pieces that you want to show off and will bring together a healthy ambiance to any room.


Frames look sturdy

Frames are sturdy. Once art is put in a frame, it instantly appears more sturdy and durable. Frames can bring structure and stability to any room and they will help make a room feel more comfortable. At the same time, the sturdiness and stability of frames helps make your art look balanced. Hanging art that is in a frame is much easier than art without a frame. The hanging process is important to make your art look even and balanced. Frames help immensely with this process.


Frames have personality

When you are picking a frame for your art, consider the piece that is in need of a frame. What kind of frame would flatter the artwork? You can use a bold frame to draw out certain colors of the piece or you can use a neutral frame that allows the piece of art to speak loudly for itself. Different kinds of art can be put in ornate and detailed frames to bring a completely different vibe to the room’s atmosphere.


Frames add value

Like any kind of accessory, a frame can add value to your art. It can make your piece of art look more decadent, polished, tasteful, and valuable. The frame can add an allure to the work of art that it may not have had before.


At Frame Warehouse we want to help you find and select the best frames for your art work! It is so easy to harmonize your home and add value to your design with the right frames. Let us help you today!

How to Properly Clean Art and Photo Frames

how to clean frames

A framed photo or art piece can be the highlight of a room, drawing conversation and attention of guests. It might even captivate viewers enough to accumulate fingerprints. And that’s in addition to the common dust and grime built up over time. So even when you’ve invested in a top notch frame to keep your artwork protected, the inorganic and organic material that interacts with it can react adversely with the frame glazing and break down its protective properties.


Don’t leave the precious pictures and art on your walls unprotected in old frames! Instead, clean your frames regularly with the following steps.


Clean The Surface:


  • Glass – Glass doesn’t require too much fuss. A common streak-free glass cleaner and soft, lint-free cloth will easily wipe away fingerprints and dust.


  • Acrylic or Optium Glazing – Glazing requires a little more care than the typical glass. Use an anti-static acrylic cleaner and a microfiber cloth.


Identify and Clean Frame:


  1. Identify Frame – Wooden, sprayed, gilded, color-washed, or welded? A specific frame type has a specific sensitivity, requiring an alternate method of cleaning. A frame professional at Frame Warehouse can identify your frame for you if you are having trouble.


  1. Choose Solution and Cloth –
    1. Clear, Color-Free Acrylic or Glass Cleaner – Use this combination for sprayed frames. Sprayed frames are probably the least sensitive, and can usually be cleaned with the same supplies at the glass or glazed surface.
    2. Clean, Dry, Lint-Free Cloth – Wooden frames are a bit more sensitive. It’s best not to use any solution to clean wood, unless it is specifically a wood cleaner (and sometimes not even then). The harsh chemicals can break down the organic structure of the wood. Instead, a clean and dry, lint-free cloth will be able to rub the grime away.
    3. Cotton Gloves and Feather Duster – Gilded, color washed, and welded frames all fall into the most sensitive frame category which requires delicate handling. Wear cotton gloves when handling these and whisk away dirt and grime with a feather duster. If you don’t have a feather duster, you may use a soft lint-free cloth. Avoid using pressure.


  1. Spray Solution onto Cloth – Never spray any cleaning solution directly onto the glass, glazing, or other frame elements. Always spray onto the cleaning cloth, letting the air hit the damp cloth for a few seconds before making contact.


  1. Use Small Circular Motions – Wipe the cloth or duster in circular motions.


  1. Continue Movement Until Solution Evaporates – If you are using a solution on a cloth, be sure to continue rubbing until the solution evaporates completely from the surface of the frame.


Even if a frame is cleaned properly, over the course of time it’s recommended to seek refurbishment. Refurbishing or replacing a frame will ensure that the artwork or other precious image displayed inside will stay in top condition. Somewhere between 5-10 years, a frame may start showing wear or be weakened, resulting in less moisture or UV protection for instance. When that time comes, Frame Warehouse can offer you a great selection of frames to replace the old one.

How to Remove Photos From Magnetic Albums

magnetic photo album

Last month, we explained how to best care for aging photos and we mentioned avoiding magnetic albums. But why are magnetic albums so harmful? And what can you do if a magnetic album that houses dozens of irreplaceable, one-of-a-kind photos of your ancestors was passed down into your possession?

You can recognize a magnetic album by its thick paper stock pages with Mylar or PVC plastic covers. Thirty to forty years ago, these were popular as a simple way to showcase photos. To stick a photo between the lightly adhesive pages and sticky plastic covers took a matter of moments. However, it has since been discovered that the glue utilized in these magnetic albums have a high acidic content that can potentially eat away at the backs of photos. Not to mention that the plastic page covers hold in the toxic fumes from the acidic reaction, essentially helping the photos to decompose faster.


Many precious photographs have been completely destroyed by these magnetic albums, so it’s best to remove the photos that remain in these destructive bindings. Follow these steps to do so:


  1. Make Copies and Be Aware – All of the methods of photo removal from magnetic albums have the chance of damaging any writing on the backs of the photos, if not the photos themselves. It’s best to make photocopies of the images that you do not wish to lose.
  2. Lift a Corner – There is a chance that the photographs will come up easily, despite the deterioration and old adhesive. Attempt to gently lift a corner of a photo that means less to you. If it lifts easily, slowly peel the photo up the rest of the way. Keep in mind that all of the photos may not come up in this way, so no hurried movements.
  3. Use Dental Floss – Using unwaxed dental floss pulled taught, slide the floss between the paper stock page and the photo. Saw back and forth gently until the floss can move down the entire length of the photo.
  4. Freezer – Place the entire magnetic album or just a single page in the freezer for a few minutes. Do not allow it to stay in the freezer much longer or condensation on the photos could damage them. The glue should become brittle, allowing for easier removal.
  5. Microwave – Place an individual album page in the microwave for around 5 seconds. Then flip the page over and heat for another 5 seconds. Repeat until the photo seems able to shift away from the page. The heat allows the adhesive to heat up, making the photos easier to remove. But it can also heat the glue up to the point of damaging the back of the photo, so take care not to overheat!
  6. Metal Spatula – A spatula works similarly to the floss and microwave options combined. As you slide the metal spatula under the photo, use a blow dryer to heat the metal and sever the adhesive more easily.
  7. Un-Do – This product is a special adhesive remover that comes with a special tool that directs the solution safely under the photos. However, it is not safe for the front faces of images, so be careful.


Finding photos in magnetic albums is never a good thing, even if they seem in perfect condition. If the removal process is going to take a long time (ie a few days or weeks), it’s best to cut out the plastic covers from the albums and replace with temporary acid-free tissue that can keep the photos separate and ventilated better.


Once your project of removing photos from the magnetic albums is complete, chances are that you’ve found some pretty spectacular images you would like to give special attention to and maybe even hang! Frame Warehouse offers a wide variety of photo frames that are sure to protect as well as display those rescued family memories – just in time to display or give as gifts for the holidays!

Caring for Old Photos

caring for old photos

If a picture is worth a thousand words, it would a shame to lose that story to degradation over time. Unfortunately, photographs (especially older ones) are extremely time-sensitive and delicate. Any number of environmental extremes can break down the chemicals on a photograph, destroying the integrity of the picture. Many images (like those of distant ancestors) cannot be replaced. If photographs are not properly stored, instead of passing down these physical memories from generation to generation, they can become lost.


But there are ways to fight photograph aging and destruction! The first step is knowing how to care for old photos, something that seems foreign to a generation in which photos are captured digitally. Follow these tips to preserve your old family photographs:


Storage Environment:

Photographs should be stored away from moisture and extreme temperature. Basements are not ideal, and anywhere near vents, heating units, or direct sunlight can cause faster photo degeneration as well.


Storage Containers:

Plastic tubs or sleeves are great for storing photos if you can’t get ahold of acid-free boxes. If you are displaying photographs in albums, make sure the pages are acid-free as well.


Worried about photos sticking together? Though it may seem tedious, photographs should ideally be stored with acid-free paper between them.


What to Avoid:

  • Acidic Paper – Why is acidic paper and materials so bad for photos? Acids destroy photo pigment and eventually photo paper. Everything you use to store and display photos should be acid free or “archival quality.”


  • ‘Magnetic’ Photo Albums – The albums your parents and grandparents used that have sticky pages and plastic overlay sheets are equally bad for photograph preservation. Photo backs become eaten away by the “sticky” page and a photograph may eventually stick to the plastic overlay sheet.


Photographs found in these conditions require delicate handling and tender love and care. Keep an eye out for an article next month about how to safely remove photographs from magnetic albums.


With so many great memories and family portraits captured in photographs, you don’t want to store them all – you want to display them! But there are proper techniques to follow for framing, just as there are for storing old photos – techniques like matting a photograph to keep it from sticking to the glass and allow ample circulation. Framing old photos is an art in itself, an art that Frame Warehouse has perfected. The expert framers at Frame Warehouse know which matting and framing materials to use to preserve those precious photo gems!

8 Rules of Photography Composition

photography tips

Now that you know the Basics of Photography, it’s time to talk about composition and maximizing the aesthetics of your photographs. Let’s face it – when the perfect moment arrives, whether it be sun rays passing through a misty forest or the smiles on children in a playground, it’s difficult to think about rules. All you want to do is snap a shot that conveys the same passion and inspiration you feel about the imagery. By mentally arranging photos using a set of broader guidelines, you can train your brain and eyes to naturally set up and take better photographs.


With that in mind, take a few shots using these eight basic “rules” of photographic composition:

  1. Background – Avoid clutter behind your subject. This doesn’t mean avoiding color or action. You can’t always control certain elements, and some actually add to your overall effect. However, simplicity is key when starting out. Consider changing positions or blurring the background with a closer lens focus.


  1. Patterns – Symmetry exists everywhere you look, and not all of it is man-made. Certain symmetry can provide intriguing composition, especially when the pattern is interrupted in a meaningful way. After all, the human mind follows patterns. In that way, it also notices and tries to analyze discrepancies.


  1. Rule of Thirds – Break your scene into thirds in both the horizontal and vertical directions with imaginary lines, creating nine sections of the photo. Set your composition up with the subject(s) along the lines and especially where the lines intersect. For some reason, filling these areas looks better in an image.


  1. Balance – The rule of thirds can be tricky when you have only one subject. You don’t want to leave the rest of your picture empty. There is no interest there. Instead, fill the background with a secondary subject. The rule of thirds will accent your primary subject and the composition will seem more balanced.


  1. Leading Lines – Diagonal or curvy lines made from objects or natural landmarks like rivers, mountain ranges, etc. can spice up a photo as well as lead your eyes into the image. When you utilize this rule, be sure that the lines are leading to a subject or some sort of conclusion.


  1. Viewpoint – Oftentimes an uninteresting subject matter can be transformed with a simple shift in viewpoint. Don’t be afraid to move around and take shots from alternate angles, especially changing the camera level. For instance, a photo of a statue or building from low to the ground can create a menacing or overwhelming feel.


  1. Framing – Another way to accent your subject is through composition framing. Try using trees, archways, window frames, etc. to draw the eye toward the main subject matter.


  1. Depth – Photography is a two-dimensional representation of a three-dimensional world. An actual scene may have a foreground, a middle ground, and a background. Convey this kind of depth by overlapping objects or setting similar objects at differing distances.

These rules are a great start to training your eyes and brain for better photographic composition, but remember that there are no real “rules.” In fact, many great artists have become great by breaking rules. Don’t be afraid to experiment and even purposefully ignore or do the opposite of any of these. It might just revolutionize modern photography!

When you’ve developed or downloaded your film, take your favorite shots into Frame Warehouse to finalize the collection!