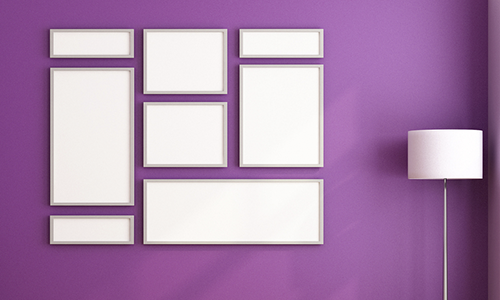
Wall Photo Clusters: Eclectic or Refined?

photo clusters

No family room or entertainment space is complete without a focal wall. For some focal walls, a built-in fireplace stands as the testament of strength and warmth. But other walls often don’t have a natural focal point. In those cases, a photo collage is a great way to give personality and pizazz to an otherwise bland wall. In creating a photo collage, you’ll also bring a great design element to the room and display memories that will make you smile each time you see them.

If you’re ready to start building a photo collage of memories on your focal wall, follow these steps:


  1. Choose Photos – With hundreds of photos to choose from on your computer, this may be the most difficult part of a photo collage. Luckily, most collages include a larger number of photos. Depending on the size of your wall, you can start with somewhere between 5-15 photographs.
  • Eclectic: If you include fewer photos, you can enlarge a couple to stand out. This method ensures a collage of varying sizes and shapes of photos.
  • Refined: For a more refined appeal, you can design your collage to include photos of the same size, shape, and orientation.


  1. Stop by Frame Warehouse – Frame Warehouse professionals can guide you to find the right frames to match your project and personality.
  • Eclectic: Select frames of to fit the various sizes of photos you’ve chosen. The size differences themselves can add enough variety, but you may also opt for frames of different colors and materials – dark and light wood, black plastic, antique finish, ridged or smooth.
  • Refined: The frames should match in at least one way, whether they are the same color, material, or texture. There should be some unifying factor.


  1. Shop for Jazzy Little Extras – Whether you are leaning toward an eclectic or refined photo collage, shopping is the best part! You can add class and/or personality with other wall decor. For instance, you could center your collage around a wooden block letter (the first letter of your name), an inspiration or affirmation quote, mirror, or metal flower.


  1. Block Out the Collage on Your Wall – Before hanging and putting holes in your wall, plan out your collage! One of the quickest and easiest ways is to trace your photos onto old newspaper, cut out the shapes, and arrange them on the wall. Be sure to use a tape that is gentle on paint or wallpaper so that you do not damage the wall by sticking and removing the newspaper cutouts. This way, you can also move the shapes around and step back to test out different collage looks.
  • Eclectic: Stagger the newspaper shapes on your wall. Spiral the photos away from the center or create “rays” of photos in lines extending from the center. Be creative!
  • Refined: Line up your newspaper shapes in rows and columns to create a larger straight-edged shape: square, cross, rectangle, etc. Use a ruler and leveling device to ensure measurements are maintained and symmetrical.


  1. Hang Time! – You’ve done the grudge work, now see the results! Hang each photo piece by piece, replacing the newspaper shape with the framed photo to which it corresponds.


Your hard work is complete and your focal wall looks fabulous! But as the years go on, you’ll probably want to switch out a few photos or even add some to the outside edges of the collage. Remember Frame Warehouse for all your framing needs! The framing experts guarantee quality and unmatched service so that your photos and artwork dress up your home for years to come.
The 3 Components of Mirror Design

framed mirrors

“Mirror, mirror on the wall, who’s the fairest of them all?”

There are many iconic stories, scenes and tales surrounding mirrors. Maybe it’s because of the nature of intrigue from a backwards world beyond the glass. Or maybe it has more to do with the magic of somewhere not quite accessible. Maybe it’s just about vanity and power over your world, as the Evil Queen from Snow White would have us think. Mirrors can be hung to be used for viewing a reflection, opening up a small room, or simply accenting a wall.

No matter how you use a mirror, why not design one that is unique only to you and your home? There are several features to think about when designing or choosing a ready-made framed mirror. Read on for ideas!


  1. Size and Shape – Think first about the purpose and space for which you are designing the mirror. A bathroom mirror will be far different than a bedroom mirror, office mirror, or restaurant mirror. A bathroom might be the most common room in a household for mirrors, but how is it truly used? If it’s used for for doing hair or putting on makeup, the mirror could be as small as the size of a face. Whereas, a bedroom mirror (even one that hangs on a wall) might be floor-length for checking the way a garment fits. Shape depends more on the rest of the room. A mirror, like a picture, should be considered a piece of furniture. It’s a permanent fixture that adds to the overall aesthetic. A rectangle or square screams modern and bold while a circle or oval mirror whispers classic and soft.

  1. Glass – Mirrors can be made of any type of glass, from clear to colored, float or blown, and everything in-between. Most mirrors are made from float glass (the kind typical for windows). It’s the layer of metal that goes on the backside of the glass that makes the true difference. Typical mirrors are made from a layer of silver which is then painted over for protection of the metal. The metal reflects the refracted light that passes through the glass. However, you could realistically have a mirror custom-made from any type of metal and glass combination. In addition, mirror glass can be stylized. Etchings and cuts can be made, especially for mirrors whose purpose is decoration rather than utilization. However, it’s not unheard of to fancy up a bathroom or bedroom mirror with an outer edge etching or beveling.


  1. Frame – Once you’ve decided on a place, size, shape, and type of glass for your mirror, you will need to finish the design with a beautiful frame. Frame Warehouse offers a large selection of frame styles, types, and colors. Wood, metal, plastic; antique finish or jet black; ready made or custom – the choices are practically endless!


If a picture says a thousand words, think how many words a mirror could say! Stop into Frame Warehouse to design your perfect mirror, then take it home and let it inspire looks and reflections for years to come! Or score one of our ready-made framed mirrors! While you’re there, take a look at the framed art and prints; you never know what piece might be a perfect companion to your new mirror.

5 Tips for Making Your Home Decor Look More Expensive

custom frames

Dressing up your home in the appearance of wealth need not actually empty your bank account. Part of the “expensive” look comes from the skill of interior decorating and some fancy tricks. Want to be let in on the secret? Read on to discover five tricks to dressing up your home decor!


  1. Three is a Magic Number – For some unknown reason, the human brain digests information and takes pleasure processing things in threes. The triptych, a three-paneled piece of art, arises from early Christian artwork and has been established in different cultures throughout the history of the world for this reason. Historically, a triptych was able to be folded in on itself as well as displayed open. However, the revitalized version seen today is a group of three separate pieces of art which depict one scene or subject, usually hung in close proximity on a wall. The history of this device and the human preference for three make this a great method for decorating a space to seem more expensive and cultured.


  1. Expand a Room Without Renovations – Renovations are expensive, and size is generally associated with a higher price tag for that reason. Instead of investing in reconstruction, throw down a large rug and hang a few mirrors. Both of these give the illusion of space and expense. Also, avoid loud colors in everything from decorative throws to frames. Keep it neutral!


  1. Create a Focal Point – Every room, especially ones frequented by guests, should have a focal point in order to be balanced. The easiest focal point is a large piece of art or art collage on one wall. Try not to overpower the room with multiple walls with large paintings, as it ends up looking cluttered.


  1. Try Textured Wallpaper – In smaller rooms like bedrooms, it’s ideal to create the intention of “cozy” rather than cramped. Applying textured wallpaper on one wall is budget-friendly and adds warmth and personality. Many decorators call this an “accent” wall because it should ideally accent everything else in the space. It also causes otherwise flat pieces of art or photographs to pop.


  1. Add an Element of Surprise – Fancy and expensive aesthetic doesn’t have to be boring. In fact, it’s more often bold. Jazz up a neutral room palate with a pop of unexpected color in an accent pillow or a single picture and frame in a larger collage.


Whether you have family coming into town, love playing hostess, or simply want your home to look top notch on a daily basis, take these decorating tips into consideration! Need a perfect focal point painting for your living room? Want custom frames for a wall collage? Thinking of expanding the size of a room with a mirror? You can find all of these and more at Frame Warehouse, so stop by today!


6 Essential Tips for Hanging Frames

hanging frames

Hanging framed art, mirrors, and photographs is an essential aspect of decorating. For new homeowners, a first time renter, expecting parents, or a business upstart, decorating is also one of the most exciting tasks for building a livable space and making it truly your own! However, when you’re staring down a series of blank walls, it can be a little intimidating. Where do you start? What if you change your mind and have holes in your otherwise pristine walls?

If this sounds like your situation, you could probably use some advice, and that’s why we’re here to provide the six essential tips for hanging frames!


  1. Reconsider Nails – A nail usually functions just fine to support smaller art pieces, mirrors, etc. But consider other options that have a wide balance for the weight, such as screws or threaded anchors. The right hardware now will help prevent tilting and falling later on. Something else to take into consideration is if you are hanging on sheetrock walls, plaster or wood – make sure to do your research before drilling or hammering into the wall!


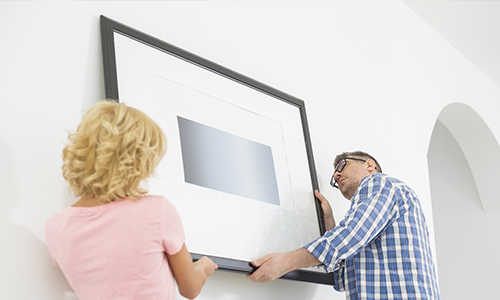
  1. Create a Template – Everyone does this at one point or another, claiming to be able to eyeball how twelve framed pieces will fit together on a wall and just starting to drill – only to run out of wall space or create a wall full of holes. To save time and a potential headache, create accurately sized picture stand-ins from newspaper and tape them up on the wall. Stand back and rearrange until you are satisfied by the placement.


  1. Eye Level? – The general rule of thumb for hanging a framed piece is to keep it at eye level. However, there are exceptions. Framed pictures and mirrors may be above or below eye level if they are part of a bigger collage of framed pieces on the wall. It’s possible to cover an entire wall this way, making it impossible for every piece to be at eye level. In addition, a framed art piece hung above a couch or other piece of furniture should only be 3-6 inches above. Any more and the eye will be drawn to the blank wall rather than the focal point that is framed. Measure twice, drill once!


  1. Just a Reminder – Have you been a victim of drilling dust and plaster residue littering your carpet from the simple process of hanging a frame? Try folding a post-it note in half and adhering it to the wall just beneath the spot you will drill. The V shape of the note will catch falling dust and debris.


  1. Sore Fingers? – Don’t find out the hard way that you aren’t a good aim! One overly zestful strike and the hammer may come down onto your fingers instead of the nail. Try holding the nail steady with a clothespin. It keeps your fingers at a safe distance while maintaining control over the nail.


  1. Size Matters – Big walls should have big pictures or a grouping of smaller pictures. Similarly, a smaller wall should not be overpowered by a piece that covers the entire wall.


Planning and prepping for the ease of hanging art and mirrors is only half of the battle. The other half is framing! Let Frame Warehouse fight that battle by your side, helping you decide amongst the many options for frame style, material, and color. If you have a collage, you might want to have all of the pieces custom framed to match – Frame Warehouse can do that, too!

Lions and Tigers and Buttons – Oh My!

framing button art

Did you catch our Wizard of Oz reference in the last blog? It was a subtle hint to this great DIY project. Fall is a great time of year for childlike whimsy – and nothing says whimsy quite like buttons! When combined with a holiday theme such as Wizard of Oz or Thanksgiving, you can’t go wrong with this fun art idea.


Chances are that you remember your grandmother having a button drawer or tin when you were little, and it seemed like a veritable treasure trove to dive into and discover all of the colors and sizes and shapes. Buttons haven’t gotten more boring, but they have most likely been overlooked. Buttons that have fallen off of clothes and bags, buttons that have come as extras with clothes bought from the store, buttons that you’ve found – it’s time to turn these lost items into a treasure again!


Follow these steps to build a button masterpiece:


  1. Choose an Image – Choose an image that means something to you and your family, whether it’s a silly turkey, a fall oak tree, an owl, or the Emerald City! You can find the image online and choose to print it off and trace the outline onto a new sheet of paper or outline the image by hand onto any size blank sheet of paper that you want. Once it is traced onto this sheet of paper (poster paper or construction paper works well), carefully cut out the image. The cut-out should be recognizable when placing another contrasting paper behind the first. If it’s not recognizable, you may want to choose a simpler shape.


  1. Button Frenzy! – Go through those odds and ends buttons to select the colors, sizes, and shapes that will peek through the cut-out of your paper. Is your image an oak tree? Choose browns, blacks, and brasses for the trunk and fiery colors for the leaves. Is your image the Emerald City? Pull every green, yellow, and gold button you can find!


Lay a poster board or canvas flat and cover the surface with glue. Use the kind of glue that dries clear to avoid mishaps (especially if you are creating this piece with the kids in your life). Start gluing down those buttons! Press each firmly into the glue starting in the middle and working your way out, leaving as few and small gaps as possible between the buttons.


  1. Fill in the Gaps – There are bound to be gaps between some of your buttons; they are all different shapes and sizes, after all! Try filling the gaps with small beads, glitter, or gems. You can find these sorts of supplies in various craft stores or online for relatively cheap.


  1. Overlay the Image – Cover the back of your cut-out image with the glue and lay it down over the button board. A number of the buttons may be covered or partly covered, but this is okay. The buttons, beads, and other lost items will be seen through the image cut-out in the holiday shape you have selected!


Whether you are passing on the “magic” of buttons on to the next generation or just reliving the whimsy for yourself, this button collage is a great tribute to childhood fun and an inventive way to celebrate the holiday season! Of course, once it’s done, it’ll need a frame to accent and finish the decoration. What better place than Frame Warehouse to seek that last bit of inspiration for the design? With thousands of framing options to choose from, you are sure to find the right touch to button up your artwork!

Home Is Where the Heart Is

map framing

Is there a city, state, or even country that claims your heart and has always felt like home? Maybe you live there, or maybe you have a dream to one day move. No matter what this special location means to you, it’s time to showcase it!


Earlier this year, we detailed a step by step process on making a map monogram. This project is a less literal interpretation of that same concept, for those who love travel or simply want to add an interest piece to a bare wall. Without putting a map directly on your wall, it highlights a location in an artistic and abstract way with nails and string.


What you will need: wooden board, paint, skinny nails, hammer, string

Ready for a DIY hardware extravaganza? Follow these steps to construct your very own heart and home map:


  1. Prepare a Board – You may be able to find a wooden plaque or precut board or you may choose to have one cut to a desired size. If you are planning to use a standard printer to print your map outline, try to keep the size of your board between 10 and 14 inches in length and width. It should also be between ½” and 1” thick to accommodate nails without splintering. Once this board has been chosen and sized, feel free to paint it over with a color of your choice. Any color will do – from plain white to neon pink! Just make sure you plan accordingly for whatever room the piece will be featured.


  1. Cut Out Your Map – Print your chosen map. A state or country map works the best for a more recognizable outline. The map details (roads, names, colors, etc.) don’t matter because you will only be using the printed map as a template for the outline. Cut out the map. Don’t forget to draw and cut out a heart shape in the center of the map as well. Or, if you’d rather, accent the specific city or state within the map that means most by cutting out the heart shape around it; it’s okay if it’s off-center! The heart should be 2-3” wide.


  1. It’s Hammer Time! – Position a nail at any edge of the map and hammer it straight down into the board. Be sure to hammer on a hard surface such as concrete, in case the nail punctures through the board. It could potentially scratch or damage whatever is below. Repeat this process until nails outline the entire map and the inside of the cut out heart. Nail heads should almost touch but leave enough room for a string to pass between them.


  1. Remove the Map – Carefully lift the map free from the board. Now you have a map outline from nails!


  1. String the Nails – Choose a color of string that complements the board color. Tie one end of the string to any nail on the outline. Then guide the string to the center heart and circle the string around the nearest nail. The string will then extend back out to the next proximate nail on the outline. After circling around that nail, it will go back to the center heart. (Because the heart will have far fewer nails, more than one outline nail will be connected by the string to a single heart nail.) In this way, the string will create a bunch of inward pointing lines that connect the heart to the state or country outline.


Fall wouldn’t be complete without The Wizard of Oz, and this DIY art construction will have you thinking, “There’s no place like home.” It combines industrial strength and delicate charm for an upbeat conversation piece that will mean something to you for years to come. And if you want to dress it up a little bit more before hanging it up in your office or home, consider choosing one of the great framing selections from Frame Warehouse. The staff at Frame Warehouse can help fit three dimensional pieces like this into a quality, lasting frame without hassle!

Melted Crayon Creativity!

crayon art

Crayons have long been the go-to art utensil for children around the world. You probably have childhood memories of an open notebook and crayons spread out over a table in no particular way, laying exactly where you threw them down to hurriedly grab another and another. And maybe you even have children or nieces and nephews that bestow you with their masterpieces of scribbled color. The excited frenzy that you see in the art of children and once felt yourself can be relived in a unique DIY crayon art design!


This project is not your typical crayon design on coloring book pages, but rather a more adult version that harnesses the playful energy and creativity of crayons.


What you will need: canvas (any size), basic paint set and paint brush, Crayola crayons, blow dryer

Follow the steps below to create a modern color splash design with crayons!


  1. Gather Materials – Decide on the size of canvas you want, depending on where you plan to hang the finished piece. The size of canvas will be a good indicator of how many crayons you will need; you want to try to cover at least 50% of the canvas with color. The paint can help fill the empty spaces and add to the design, but don’t rely on the paint to be the focus point.


  1. Decide on an Image – Your piece should have a cohesive idea. The idea could be as simple as a color pallette or as complex as an image, such as a tree. Decide where in your image you will incorporate splashes of crayon color. For a tree, the crayon splashes could be groups of leaves – great for the changing fall colors look!


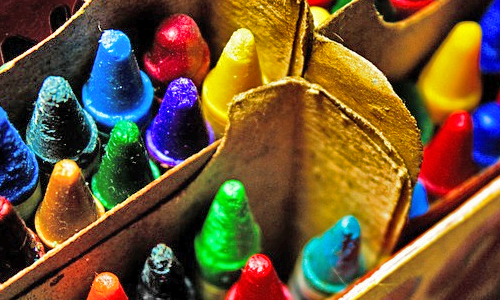
  1. Melt Crayons – Unwrap the crayons you have chosen. Using a fork or tweezers, hold out the crayon over the canvas. Turn the blow dryer on the highest heat and point it downward over the crayon and toward the canvas. As the crayon melts, the color will splash across the canvas. Repeat this with several dozen crayons of varying colors. The splashes can be isolated or overlapping.


  1. Add a Splash of Paint – This is the step that pulls the whole idea and image together. Did you imagine the color splashes as groups of tree leaves? Then add brown paint extending down from them like a tree trunk. If you were just experimenting with isolated splashes of color, you could add green stems and turn them into abstract flowers. Or just play around with paint shapes and outlines over the top of the crayon splashes for a more modern graphic look!


  1. Finish – The crayons must cool in order for the color splashes to harden into place. The paint must also dry. Once enough time has passed, you may choose to add a spray finish to keep the colors from running or smudging further.


Have you been looking for a simple art project for Sunday afternoon? Or maybe you need to dress up your apartment for a showing? This DIY melted crayon design is a fun solution to suit your boredom and decoration needs! And best of all, it’s inexpensive and doesn’t take intensive art skill. Once you’ve finalized the piece and are ready to display it, head over to Frame Warehouse to choose the perfect finishing frame.

Raised Letter Art

creative framing ideas

You may remember ABC blocks from your childhood, or perhaps your mother pulls out the photo album each year and shows you an embarrassing picture of yourself stacking them up to create nonsensical words. You have to admit that there was something altogether artistic about the look of stacked and arranged wooden letters, even if they didn’t make complete sense.

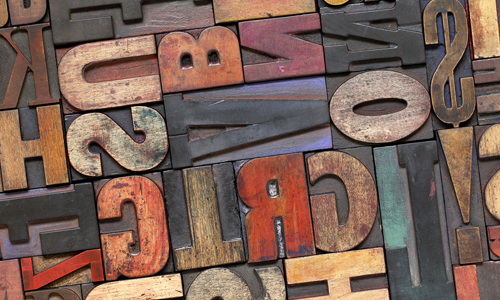
Well, now you once again have a chance to play with blocks – letter blocks, that is – and turn them into art! Of course, this time you will be arranging them into words, lyrics, and quotes that are meaningful to you. All you need for this DIY project are wooden letters (anywhere from ½” to 3” in height), canvas, glue, and some kind of paint.

Take these four steps and you’ll have a unique and meaningful 3D art piece in no time!


  1. Choose letters.

Any crafting store will have a variety of sizes and styles of wooden letters. Choose a size that is appropriate to your chosen canvas size. If you are creating a piece that is smaller than a few square feet, you probably don’t want letters over 1” tall. The smaller they are in proportion to the canvas, the more design options and longer quotes you will be able to accomplish.


  1. Plan a design.

This art project is a great opportunity to express your inner poet or simply quote your favorite movie line. In addition to the words used, you must also design the layout. Centered or offset to the side? Curving or perhaps slanting downward? You can even make unique shapes with the words! For instance, you could arrange words like “love,” “friendship,” “family,” “home,” etc. into the shape or outline of a heart.


  1. Paint letters and canvas.

Spray paint, acrylics, or even house paint will work for this project. The canvas and wooden letters need not be the same color. If they are, the art takes on an interesting ghost image effect. If not, the letters can really pop and create a 3D texture in the space.


  1. Place and glue letters.

Finally, after the letters and canvas dry, arrange the lyrics, quote, or word shape on the canvas itself. Then, you will want to turn the letters onto their “fronts” one by one and glue the backs with spray adhesive or wood glue. Turn them right-side up and press down onto the canvas. Once each individual letter is securely in place, you’re done!


One of the coolest aspects of this project is the way the wooden letters pop from the canvas and give it that 3D feel. The wrong frame can flatten the aesthetic look and turn your effort into a common word print. Don’t take that chance! Instead, bring your creation into Frame Warehouse and get expert advice from the framers who care just as much about your final work of art!

DIY Geometric Mosaic

mosaic framed art

Remember being forced to take that beginner’s art class in highschool and having to painstakingly put together a mosaic? Well, that was then and this is now. You need a colorful art piece to splash up your living room, kitchen, bedroom, or even office – and we’re here to tell you that not all mosaics are as aggravating as your high school art projects. In fact, this geometric mosaic is simple, inexpensive, and tons of fun!

What you will need: canvas or canvas board, ¼” or ½” painter’s tape, paintbrush, and a lively paint color!


Follow these five steps to complete your very own geometric mosaic (that doesn’t look like it was made in high school art class):

  1. Measure out an appropriate size for the desired space.

Where is your finished piece going to hang? Does it need to cover an entire wall or just a select space between two windows? Once you have the perfect place in mind, measure out the desired dimensions and then go in search of an appropriate canvas. Canvas board may be less expensive, but keep in mind that it can warp in humid climates, especially if it’s a bigger size. Be willing to accept slightly different dimensions than you’ve measured if you are on a budget.


  1. Tape your canvas.

Now for the creative part! The next three steps will determine what your art piece looks like in the end. It starts with taping your canvas. Lay lines of ¼” or ½” painter’s tape across the canvas in various directions, criss-crossing and creating many different angles and geometric shapes. Make sure each piece of tape extends to the edges (meaning the ones at a diagonal will be much longer than the rest).


  1. Block out select geometric shapes.

Depending on how you lay your tape, you may have dozens upon dozens of distinct shapes – from triangles to pentagons. Choose anywhere from one to five of these that will remain white and unpainted for contrast. Mark them with a small piece of tape or another type of marker such as a penny.


Choose a paint color that accents the soon-to-be decorated room. Does it already have a color scheme? Work with that. If it’s bland so far, spice it up with a bold red or daring purple! Need something more peaceful? Sea foam green and robin’s egg blue are popular choices as well. Paint each unmarked contrast space with your chosen color.


  1. Allow to dry.

This is probably the most difficult part of all – waiting. It shouldn’t take too long to dry, but be certain that it is before lifting the tape or your color might bleed into the white regions.


  1. Untape and voila!

Slowly peel back each strip of tape. Then step back and admire your not-so-high school handy work!


Now that you’ve revisited an old high school antagonist (the mosaic), it’s time to hang your artwork up for the world to see! But before you grab a hammer and nail, don’t forget the frame! Take your modern geometric mosaic into Frame Warehouse and the experts there will help you finish off your project with a frame that accents your art as well as your home!

DIY Postcard Collage

DIY postcard collage

Does your sister travel the world and send you postcards of all sorts of amazing, exotic locations? Or perhaps you yourself adventure cross-country to tour historic American cities and collect postcards as mementos along the way?

Deltiology, or the collecting of postcards, is thought to be one of the largest global hobbies. The postal card idea originated in Germany around 1865 and quickly caught on as being a less expensive way to keep in touch, even if there was a small loss in privacy. At the same time, envelopes in America were being decorated with music notes, comics, or valentines. These “patriotic covers” recognized the same idea.

Passing language barriers and cultures, a postcard memorializes a meaningful locale to you or to be shared with loved ones you wish were there with you. It’s a quick and easy way to remind someone far away that you care, for only a few pennies. But what do you do with them once they are collected or received? Make a postcard collage of course!

A postcard collage is fairly simple and can look pretty snazzy up on an otherwise boring wall.
Follow these steps to build your DIY postcard collage:


  1. Pick out 5 or 6 of your favorite postcards.

This is a good starting point to determine around how big you want your collage to be. Plus, you probably have a number of them that are more private or have wear and tear damage that may not show as well. The most cohesive collages have a theme that goes beyond “Cities I’ve Visited.” Maybe you enjoy postcards which feature mountain ranges or cathedrals. No matter what your theme, be sure that you are comfortable adhering them to something (meaning you will not be able to read any message on the back).


  1. Plan a suitable background.

Colored poster board works well as a sturdy background, but colors may be limited. There’s nothing wrong with using a plain white or black background if your postcards can be seen clearly against it. If your postcards already have bright colors, this might be the way to go. If you are opting for postcards with landscapes, a light shade of clover green or caramel brown might be a nice accent.


  1. Arrange postcards on background.

This is the most complicated part of the process, but it’s not complicated at all! In order to see the color of the background you’ve chosen, there are two options for postcard arrangement. One is by leaving a “frame” of color around/between the postcards. To achieve even borders, use a ruler. If you want a slightly less square design, stagger your postcards in a checkerboard pattern with touching sides. Instead of colored borders, the postcard collage will have small squares of color peeking through.


  1. Adhere postcards with spray adhesive.

Once you’ve determined an arrangement that suits your tastes, pick up a postcard and turn it over on a sheet of newspaper. Spray the back with adhesive and replace it on the colored background, pressing down firmly for 5-10 seconds. Proceed with each postcard this way until all are adhered to the poster board.


Depending on how many cards and which arrangement you choose, the size of your finished piece could vary greatly. Before trimming down the extra edge space on your poster board (if there is any), take your postcard collage in to Frame Warehouse. The staff at Frame Warehouse will be glad to help you pick out the perfect frame – fit and all! Next time you have guests over, use the collage as a conversation piece to share the stories of your travels!