Find the Best Framing for Your Restaurant

Frames for restaurants

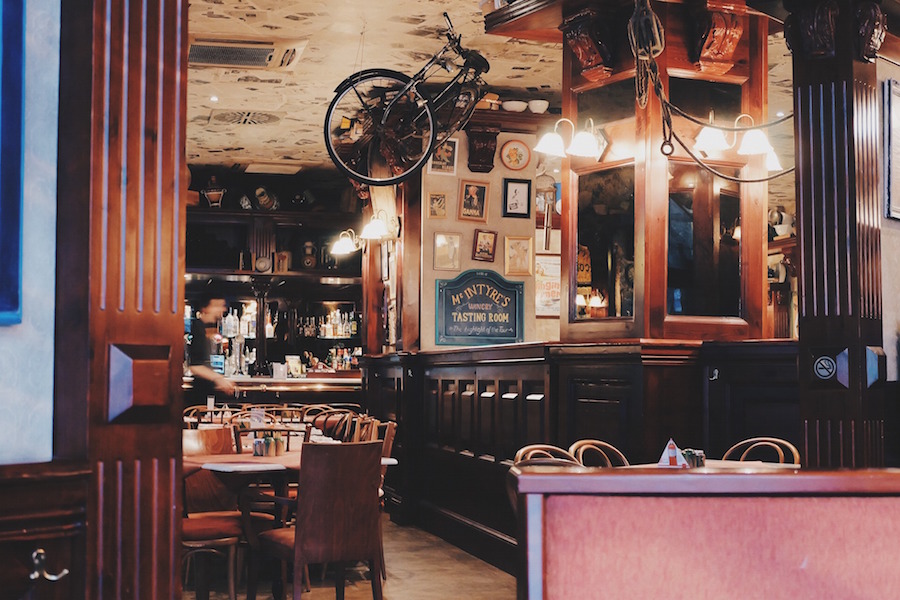
You have exceptional food, delicious cocktails, experienced staff, and phenomenal cooks, but something is missing, and you’re not sure what. Food and service are important to consumers, but the atmosphere of a restaurant is also a top priority for patrons. Have you considered ways to develop the ambiance of your restaurant to pique the interest of new customers?


Wall decor and frames are a great place to start! There is nothing more drab than blank, boring walls in a restaurant. Naturally, our eyes look for a focal point in a room. The challenge is to create focal points that are engaging, yet not distracting.


When choosing your wall decor and frames, it’s important to consider your clientele. Are they young bar-hoppers, people looking for a nice meal for a special occasion, or people just looking for good food and relaxed atmosphere? Understanding your customer base will help you develop the best atmosphere.


With your client base in mind, consider the following atmosphere themes: modern, classically sophisticated, and kitschy creative. These three atmospheres will cover the majority of clientele, and we have frame style recommendations for each one.


Modern

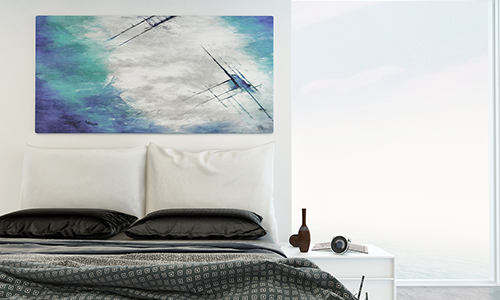
For a modern theme, you’ll want frames that are bold but also blend in. The frames will be smooth, with sleek edges and a bold color. They should be used to frame art that is geometric and simple with plenty of white space.


Classic

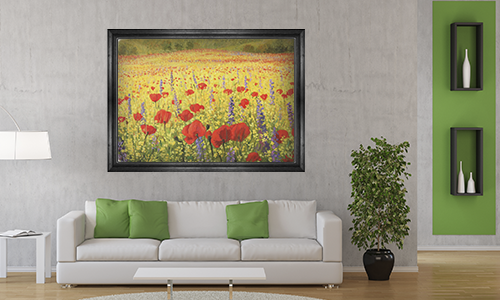
For a classically sophisticated environment, you’ll want large frames in neutral colors or varnished wood. These frames can have details and different designs and can display art with warm tones. Oil paintings are perfect for creating this type of atmosphere. This style of decor creates a charming and inviting environment.


Creative

For a kitschy creative atmosphere, you’ll want unique stylized frames. Perhaps you can use detailed frames painted in gold, with unique poster art on display. You can use textured frames to create a different sensory experience, or try implementing box frames to display DIY projects that show off your restaurant’s unique vibe.


Something else you’ll want to keep in mind when picking decor is what colors you want to use. Warm colors, such as oranges and reds, increase appetite more than cool colors, like blues and purples. Overall, frames can help develop the atmosphere that you want to create. The right frames will help set the tone for your restaurant and allow your guests to feel charmed by the environment and excited to dine!
Creating Unforgettable Graduation Keepsakes

Frame your Diploma

Whether they’re finishing college or kindergarten, graduation day is a big event for students and their families. It’s all about celebrating their accomplishments and recognizing their hard work. Long after the graduation parties are over and their cap and gown has been stored away, you can give your graduate something to help them remember their big day for years to come.

Save memories that highlight their interests. Programs from school plays, awards and certificates, or even the uniform from their first soccer game can all serve as visual reminders for how far they’ve come. A custom frame can turn their keepsake into something they can enjoy for many more years.

Get friends and family involved. At the graduation party, ask guests to sign a logo or team t-shirt from the school. Encourage them to include a special message for the graduate. The end result is a fun, portable gift that can accompany your grad wherever they go next.

If your child is still in school, you can save a photo or keepsake at the end of each school year. Add them to a photo album or scrapbook to create a keepsake that’s as unique as they are. Present it to your child on their graduation day for a fun look back on their achievements over the years.

Make their diploma stand out. The right frame will help them showcase their diploma. A classic, stately wooden frame will make their diploma look right at home in their first office. Or, if you’re looking for something more unique, consider pairing their diploma with a photo or keepsake.

Frame Warehouse can help you create the ideal custom frame for your graduate. Visit one of our 16 locations to speak with one of our custom framing experts.

Bringing the Outside Indoors

outdoors indoors

There’s something warm and energizing about the outdoors. But if you are cooped up in an office all day, only to go home and do housework, you’re never able to enjoy it. That’s why many people choose to bring the outside indoors with greenery. Plants can be great for decoration and possess conversation-starting characteristics. It’s also fun to watch them grow and thrive over time. And last but not least, it’s nice to see greenery year-round, especially when the world outside is grey during the winter.


Just because you are a fan of the outdoors, doesn’t mean you have a green thumb. So the first step to bringing the outdoors inside is to incorporate these low maintenance plants:


  • Fiddle Leaf Fig – The fig’s large leaves stay a nice deep green, and the sheer size and shape has an exotic feel. It’s almost like you’ve taken a tree from the jungle and transplanted it indoors.


  • Sansevieria (Snake Plant) – The name hints at the nature of this plant, whose leaves almost look like gigantic blades of grass. On the plus side, it’s a whole lot easier to take care of than a yard. You could leave this plant for a week or two without water, and it wouldn’t know the difference.


  • Ficus – A ficus looks like a typical outdoor tree/bush with smaller leaves that flutter in small breezes. They can stand to miss a watering, but they do shed their leaves regularly.


  • Money Tree – This braided trunk plant is a little less hardy than the rest, as it’s sensitive to overwatering. But it can live for decades and is said to bring luck to the household.


If plant care isn’t right for you, there are alternative ways to bring the outside indoors through your interior design. Animal prints are a modern favorite for upholstery and accent fixtures. Furniture with grainy wood inspires a sense of depth and character. The same could be said of wood frames. Simply fill the frames with landscape or wildlife photography in order to capture the wild outdoors inside.


Frame Warehouse offers a selection of artwork that might be the perfect fit for your nature-themed space. If you don’t find a pre-finished piece, you can ask the frame experts for guidance on wooden frames, as accents to your finished design.

Wall Photo Clusters: Eclectic or Refined?

photo clusters

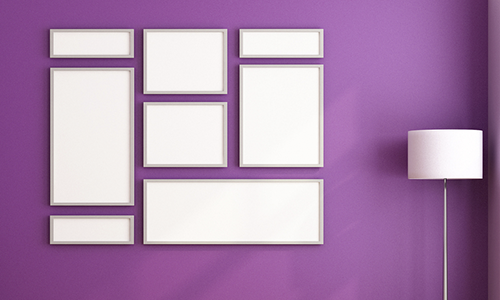
No family room or entertainment space is complete without a focal wall. For some focal walls, a built-in fireplace stands as the testament of strength and warmth. But other walls often don’t have a natural focal point. In those cases, a photo collage is a great way to give personality and pizazz to an otherwise bland wall. In creating a photo collage, you’ll also bring a great design element to the room and display memories that will make you smile each time you see them.

If you’re ready to start building a photo collage of memories on your focal wall, follow these steps:


  1. Choose Photos – With hundreds of photos to choose from on your computer, this may be the most difficult part of a photo collage. Luckily, most collages include a larger number of photos. Depending on the size of your wall, you can start with somewhere between 5-15 photographs.
  • Eclectic: If you include fewer photos, you can enlarge a couple to stand out. This method ensures a collage of varying sizes and shapes of photos.
  • Refined: For a more refined appeal, you can design your collage to include photos of the same size, shape, and orientation.


  1. Stop by Frame Warehouse – Frame Warehouse professionals can guide you to find the right frames to match your project and personality.
  • Eclectic: Select frames of to fit the various sizes of photos you’ve chosen. The size differences themselves can add enough variety, but you may also opt for frames of different colors and materials – dark and light wood, black plastic, antique finish, ridged or smooth.
  • Refined: The frames should match in at least one way, whether they are the same color, material, or texture. There should be some unifying factor.


  1. Shop for Jazzy Little Extras – Whether you are leaning toward an eclectic or refined photo collage, shopping is the best part! You can add class and/or personality with other wall decor. For instance, you could center your collage around a wooden block letter (the first letter of your name), an inspiration or affirmation quote, mirror, or metal flower.


  1. Block Out the Collage on Your Wall – Before hanging and putting holes in your wall, plan out your collage! One of the quickest and easiest ways is to trace your photos onto old newspaper, cut out the shapes, and arrange them on the wall. Be sure to use a tape that is gentle on paint or wallpaper so that you do not damage the wall by sticking and removing the newspaper cutouts. This way, you can also move the shapes around and step back to test out different collage looks.
  • Eclectic: Stagger the newspaper shapes on your wall. Spiral the photos away from the center or create “rays” of photos in lines extending from the center. Be creative!
  • Refined: Line up your newspaper shapes in rows and columns to create a larger straight-edged shape: square, cross, rectangle, etc. Use a ruler and leveling device to ensure measurements are maintained and symmetrical.


  1. Hang Time! – You’ve done the grudge work, now see the results! Hang each photo piece by piece, replacing the newspaper shape with the framed photo to which it corresponds.


Your hard work is complete and your focal wall looks fabulous! But as the years go on, you’ll probably want to switch out a few photos or even add some to the outside edges of the collage. Remember Frame Warehouse for all your framing needs! The framing experts guarantee quality and unmatched service so that your photos and artwork dress up your home for years to come.

5 Tips for Making Your Home Decor Look More Expensive

custom frames

Dressing up your home in the appearance of wealth need not actually empty your bank account. Part of the “expensive” look comes from the skill of interior decorating and some fancy tricks. Want to be let in on the secret? Read on to discover five tricks to dressing up your home decor!


  1. Three is a Magic Number – For some unknown reason, the human brain digests information and takes pleasure processing things in threes. The triptych, a three-paneled piece of art, arises from early Christian artwork and has been established in different cultures throughout the history of the world for this reason. Historically, a triptych was able to be folded in on itself as well as displayed open. However, the revitalized version seen today is a group of three separate pieces of art which depict one scene or subject, usually hung in close proximity on a wall. The history of this device and the human preference for three make this a great method for decorating a space to seem more expensive and cultured.


  1. Expand a Room Without Renovations – Renovations are expensive, and size is generally associated with a higher price tag for that reason. Instead of investing in reconstruction, throw down a large rug and hang a few mirrors. Both of these give the illusion of space and expense. Also, avoid loud colors in everything from decorative throws to frames. Keep it neutral!


  1. Create a Focal Point – Every room, especially ones frequented by guests, should have a focal point in order to be balanced. The easiest focal point is a large piece of art or art collage on one wall. Try not to overpower the room with multiple walls with large paintings, as it ends up looking cluttered.


  1. Try Textured Wallpaper – In smaller rooms like bedrooms, it’s ideal to create the intention of “cozy” rather than cramped. Applying textured wallpaper on one wall is budget-friendly and adds warmth and personality. Many decorators call this an “accent” wall because it should ideally accent everything else in the space. It also causes otherwise flat pieces of art or photographs to pop.


  1. Add an Element of Surprise – Fancy and expensive aesthetic doesn’t have to be boring. In fact, it’s more often bold. Jazz up a neutral room palate with a pop of unexpected color in an accent pillow or a single picture and frame in a larger collage.


Whether you have family coming into town, love playing hostess, or simply want your home to look top notch on a daily basis, take these decorating tips into consideration! Need a perfect focal point painting for your living room? Want custom frames for a wall collage? Thinking of expanding the size of a room with a mirror? You can find all of these and more at Frame Warehouse, so stop by today!


6 Essential Tips for Hanging Frames

hanging frames

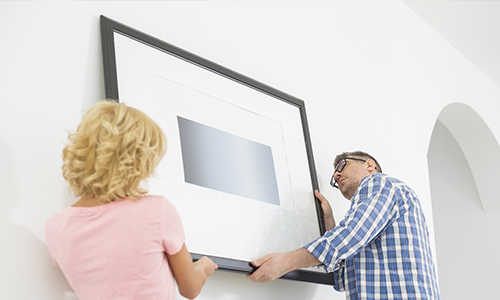
Hanging framed art, mirrors, and photographs is an essential aspect of decorating. For new homeowners, a first time renter, expecting parents, or a business upstart, decorating is also one of the most exciting tasks for building a livable space and making it truly your own! However, when you’re staring down a series of blank walls, it can be a little intimidating. Where do you start? What if you change your mind and have holes in your otherwise pristine walls?

If this sounds like your situation, you could probably use some advice, and that’s why we’re here to provide the six essential tips for hanging frames!


  1. Reconsider Nails – A nail usually functions just fine to support smaller art pieces, mirrors, etc. But consider other options that have a wide balance for the weight, such as screws or threaded anchors. The right hardware now will help prevent tilting and falling later on. Something else to take into consideration is if you are hanging on sheetrock walls, plaster or wood – make sure to do your research before drilling or hammering into the wall!


  1. Create a Template – Everyone does this at one point or another, claiming to be able to eyeball how twelve framed pieces will fit together on a wall and just starting to drill – only to run out of wall space or create a wall full of holes. To save time and a potential headache, create accurately sized picture stand-ins from newspaper and tape them up on the wall. Stand back and rearrange until you are satisfied by the placement.


  1. Eye Level? – The general rule of thumb for hanging a framed piece is to keep it at eye level. However, there are exceptions. Framed pictures and mirrors may be above or below eye level if they are part of a bigger collage of framed pieces on the wall. It’s possible to cover an entire wall this way, making it impossible for every piece to be at eye level. In addition, a framed art piece hung above a couch or other piece of furniture should only be 3-6 inches above. Any more and the eye will be drawn to the blank wall rather than the focal point that is framed. Measure twice, drill once!


  1. Just a Reminder – Have you been a victim of drilling dust and plaster residue littering your carpet from the simple process of hanging a frame? Try folding a post-it note in half and adhering it to the wall just beneath the spot you will drill. The V shape of the note will catch falling dust and debris.


  1. Sore Fingers? – Don’t find out the hard way that you aren’t a good aim! One overly zestful strike and the hammer may come down onto your fingers instead of the nail. Try holding the nail steady with a clothespin. It keeps your fingers at a safe distance while maintaining control over the nail.


  1. Size Matters – Big walls should have big pictures or a grouping of smaller pictures. Similarly, a smaller wall should not be overpowered by a piece that covers the entire wall.


Planning and prepping for the ease of hanging art and mirrors is only half of the battle. The other half is framing! Let Frame Warehouse fight that battle by your side, helping you decide amongst the many options for frame style, material, and color. If you have a collage, you might want to have all of the pieces custom framed to match – Frame Warehouse can do that, too!

How to Properly Clean Art and Photo Frames

how to clean frames

A framed photo or art piece can be the highlight of a room, drawing conversation and attention of guests. It might even captivate viewers enough to accumulate fingerprints. And that’s in addition to the common dust and grime built up over time. So even when you’ve invested in a top notch frame to keep your artwork protected, the inorganic and organic material that interacts with it can react adversely with the frame glazing and break down its protective properties.


Don’t leave the precious pictures and art on your walls unprotected in old frames! Instead, clean your frames regularly with the following steps.


Clean The Surface:


  • Glass – Glass doesn’t require too much fuss. A common streak-free glass cleaner and soft, lint-free cloth will easily wipe away fingerprints and dust.


  • Acrylic or Optium Glazing – Glazing requires a little more care than the typical glass. Use an anti-static acrylic cleaner and a microfiber cloth.


Identify and Clean Frame:


  1. Identify Frame – Wooden, sprayed, gilded, color-washed, or welded? A specific frame type has a specific sensitivity, requiring an alternate method of cleaning. A frame professional at Frame Warehouse can identify your frame for you if you are having trouble.


  1. Choose Solution and Cloth –
    1. Clear, Color-Free Acrylic or Glass Cleaner – Use this combination for sprayed frames. Sprayed frames are probably the least sensitive, and can usually be cleaned with the same supplies at the glass or glazed surface.
    2. Clean, Dry, Lint-Free Cloth – Wooden frames are a bit more sensitive. It’s best not to use any solution to clean wood, unless it is specifically a wood cleaner (and sometimes not even then). The harsh chemicals can break down the organic structure of the wood. Instead, a clean and dry, lint-free cloth will be able to rub the grime away.
    3. Cotton Gloves and Feather Duster – Gilded, color washed, and welded frames all fall into the most sensitive frame category which requires delicate handling. Wear cotton gloves when handling these and whisk away dirt and grime with a feather duster. If you don’t have a feather duster, you may use a soft lint-free cloth. Avoid using pressure.


  1. Spray Solution onto Cloth – Never spray any cleaning solution directly onto the glass, glazing, or other frame elements. Always spray onto the cleaning cloth, letting the air hit the damp cloth for a few seconds before making contact.


  1. Use Small Circular Motions – Wipe the cloth or duster in circular motions.


  1. Continue Movement Until Solution Evaporates – If you are using a solution on a cloth, be sure to continue rubbing until the solution evaporates completely from the surface of the frame.


Even if a frame is cleaned properly, over the course of time it’s recommended to seek refurbishment. Refurbishing or replacing a frame will ensure that the artwork or other precious image displayed inside will stay in top condition. Somewhere between 5-10 years, a frame may start showing wear or be weakened, resulting in less moisture or UV protection for instance. When that time comes, Frame Warehouse can offer you a great selection of frames to replace the old one.

Lions and Tigers and Buttons – Oh My!

framing button art

Did you catch our Wizard of Oz reference in the last blog? It was a subtle hint to this great DIY project. Fall is a great time of year for childlike whimsy – and nothing says whimsy quite like buttons! When combined with a holiday theme such as Wizard of Oz or Thanksgiving, you can’t go wrong with this fun art idea.


Chances are that you remember your grandmother having a button drawer or tin when you were little, and it seemed like a veritable treasure trove to dive into and discover all of the colors and sizes and shapes. Buttons haven’t gotten more boring, but they have most likely been overlooked. Buttons that have fallen off of clothes and bags, buttons that have come as extras with clothes bought from the store, buttons that you’ve found – it’s time to turn these lost items into a treasure again!


Follow these steps to build a button masterpiece:


  1. Choose an Image – Choose an image that means something to you and your family, whether it’s a silly turkey, a fall oak tree, an owl, or the Emerald City! You can find the image online and choose to print it off and trace the outline onto a new sheet of paper or outline the image by hand onto any size blank sheet of paper that you want. Once it is traced onto this sheet of paper (poster paper or construction paper works well), carefully cut out the image. The cut-out should be recognizable when placing another contrasting paper behind the first. If it’s not recognizable, you may want to choose a simpler shape.


  1. Button Frenzy! – Go through those odds and ends buttons to select the colors, sizes, and shapes that will peek through the cut-out of your paper. Is your image an oak tree? Choose browns, blacks, and brasses for the trunk and fiery colors for the leaves. Is your image the Emerald City? Pull every green, yellow, and gold button you can find!


Lay a poster board or canvas flat and cover the surface with glue. Use the kind of glue that dries clear to avoid mishaps (especially if you are creating this piece with the kids in your life). Start gluing down those buttons! Press each firmly into the glue starting in the middle and working your way out, leaving as few and small gaps as possible between the buttons.


  1. Fill in the Gaps – There are bound to be gaps between some of your buttons; they are all different shapes and sizes, after all! Try filling the gaps with small beads, glitter, or gems. You can find these sorts of supplies in various craft stores or online for relatively cheap.


  1. Overlay the Image – Cover the back of your cut-out image with the glue and lay it down over the button board. A number of the buttons may be covered or partly covered, but this is okay. The buttons, beads, and other lost items will be seen through the image cut-out in the holiday shape you have selected!


Whether you are passing on the “magic” of buttons on to the next generation or just reliving the whimsy for yourself, this button collage is a great tribute to childhood fun and an inventive way to celebrate the holiday season! Of course, once it’s done, it’ll need a frame to accent and finish the decoration. What better place than Frame Warehouse to seek that last bit of inspiration for the design? With thousands of framing options to choose from, you are sure to find the right touch to button up your artwork!

8 Rules of Photography Composition

photography tips

Now that you know the Basics of Photography, it’s time to talk about composition and maximizing the aesthetics of your photographs. Let’s face it – when the perfect moment arrives, whether it be sun rays passing through a misty forest or the smiles on children in a playground, it’s difficult to think about rules. All you want to do is snap a shot that conveys the same passion and inspiration you feel about the imagery. By mentally arranging photos using a set of broader guidelines, you can train your brain and eyes to naturally set up and take better photographs.


With that in mind, take a few shots using these eight basic “rules” of photographic composition:

  1. Background – Avoid clutter behind your subject. This doesn’t mean avoiding color or action. You can’t always control certain elements, and some actually add to your overall effect. However, simplicity is key when starting out. Consider changing positions or blurring the background with a closer lens focus.


  1. Patterns – Symmetry exists everywhere you look, and not all of it is man-made. Certain symmetry can provide intriguing composition, especially when the pattern is interrupted in a meaningful way. After all, the human mind follows patterns. In that way, it also notices and tries to analyze discrepancies.


  1. Rule of Thirds – Break your scene into thirds in both the horizontal and vertical directions with imaginary lines, creating nine sections of the photo. Set your composition up with the subject(s) along the lines and especially where the lines intersect. For some reason, filling these areas looks better in an image.


  1. Balance – The rule of thirds can be tricky when you have only one subject. You don’t want to leave the rest of your picture empty. There is no interest there. Instead, fill the background with a secondary subject. The rule of thirds will accent your primary subject and the composition will seem more balanced.


  1. Leading Lines – Diagonal or curvy lines made from objects or natural landmarks like rivers, mountain ranges, etc. can spice up a photo as well as lead your eyes into the image. When you utilize this rule, be sure that the lines are leading to a subject or some sort of conclusion.


  1. Viewpoint – Oftentimes an uninteresting subject matter can be transformed with a simple shift in viewpoint. Don’t be afraid to move around and take shots from alternate angles, especially changing the camera level. For instance, a photo of a statue or building from low to the ground can create a menacing or overwhelming feel.


  1. Framing – Another way to accent your subject is through composition framing. Try using trees, archways, window frames, etc. to draw the eye toward the main subject matter.


  1. Depth – Photography is a two-dimensional representation of a three-dimensional world. An actual scene may have a foreground, a middle ground, and a background. Convey this kind of depth by overlapping objects or setting similar objects at differing distances.

These rules are a great start to training your eyes and brain for better photographic composition, but remember that there are no real “rules.” In fact, many great artists have become great by breaking rules. Don’t be afraid to experiment and even purposefully ignore or do the opposite of any of these. It might just revolutionize modern photography!

When you’ve developed or downloaded your film, take your favorite shots into Frame Warehouse to finalize the collection!

Raised Letter Art

creative framing ideas

You may remember ABC blocks from your childhood, or perhaps your mother pulls out the photo album each year and shows you an embarrassing picture of yourself stacking them up to create nonsensical words. You have to admit that there was something altogether artistic about the look of stacked and arranged wooden letters, even if they didn’t make complete sense.

Well, now you once again have a chance to play with blocks – letter blocks, that is – and turn them into art! Of course, this time you will be arranging them into words, lyrics, and quotes that are meaningful to you. All you need for this DIY project are wooden letters (anywhere from ½” to 3” in height), canvas, glue, and some kind of paint.

Take these four steps and you’ll have a unique and meaningful 3D art piece in no time!


  1. Choose letters.

Any crafting store will have a variety of sizes and styles of wooden letters. Choose a size that is appropriate to your chosen canvas size. If you are creating a piece that is smaller than a few square feet, you probably don’t want letters over 1” tall. The smaller they are in proportion to the canvas, the more design options and longer quotes you will be able to accomplish.


  1. Plan a design.

This art project is a great opportunity to express your inner poet or simply quote your favorite movie line. In addition to the words used, you must also design the layout. Centered or offset to the side? Curving or perhaps slanting downward? You can even make unique shapes with the words! For instance, you could arrange words like “love,” “friendship,” “family,” “home,” etc. into the shape or outline of a heart.


  1. Paint letters and canvas.

Spray paint, acrylics, or even house paint will work for this project. The canvas and wooden letters need not be the same color. If they are, the art takes on an interesting ghost image effect. If not, the letters can really pop and create a 3D texture in the space.


  1. Place and glue letters.

Finally, after the letters and canvas dry, arrange the lyrics, quote, or word shape on the canvas itself. Then, you will want to turn the letters onto their “fronts” one by one and glue the backs with spray adhesive or wood glue. Turn them right-side up and press down onto the canvas. Once each individual letter is securely in place, you’re done!


One of the coolest aspects of this project is the way the wooden letters pop from the canvas and give it that 3D feel. The wrong frame can flatten the aesthetic look and turn your effort into a common word print. Don’t take that chance! Instead, bring your creation into Frame Warehouse and get expert advice from the framers who care just as much about your final work of art!