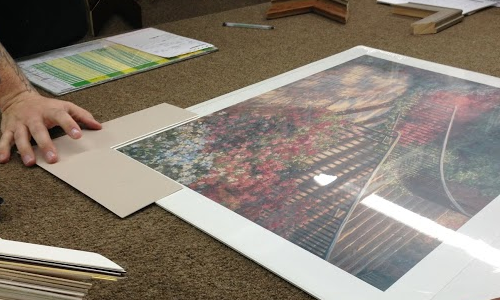
Framing Considerations

framing

You’ve struggled day and night to put your heart and soul into a project, be it a painting or photographic composition or a collage, and now you need a perfect frame. One option is to bring your artwork to a professional and hand the piece off. The framer can make all of the finishing touches to best display your piece. Or you can take a more hands-on approach. After all, isn’t the frame really a part of the art?

There are several key decisions that go into choosing a frame, and we aren’t just talking about color or design. When you take your artwork into a framework specialist like those at Frame Warehouse, prepare with these seven framing considerations:


  1. Ready-Made Frames – The primary decision you will have to make in framing a piece is whether or not to buy a ready-made frame. These frames are essentially already designed and created, so your artwork can be framed faster. They are also usually less expensive.


  1. Barrier Papers – Whether your artwork is a one-of-a-kind painting or a finger painting given to you by your 3-year-old, it holds value to you. Barrier papers offer an extra layer of protection from the elements like lignin and acid, helping preserve the life of your piece.


  1. Hinging – This is another method of framing to prevent potential damage to a piece, especially if it’s fragile. It allows the work to hang freely, expanding and contracting with changes in temperature or humidity.


  1. Mounting – Live in a humid environment? Prevent rippling and warping with a smooth, rigid mount. Special mounting board can even reduce acid levels that would otherwise jeopardize a piece of art.


  1. Matting – For light-sensitive material like photography and watercolors, matting is especially important. Matts can also reduce acid, accent art with texture and color, or simply offset the art from the frame itself.


  1. Photo Corners – Extra mounting stability can be obtained through photo corners. Not to mention that they add a certain classy appeal reminiscent of the earlier 1900’s.


  1. Glass – No custom frame is complete without the right glass! But isn’t all glass the same? Absolutely not! You may have to choose between several choices with varying degrees of UV light absorption, glare, thickness, etc.

With these considerations in mind, you should be ready to frame and cherish your artwork for years to come! The professionals at Frame Warehouse can show you examples of all of these choices and help guide you to finding the right frame composition at the lowest price. Even if you find a lower quote elsewhere, bring in the quote and Frame Warehouse will match it with superior workmanship and speed. Find the location closest to you!

DIY Geometric Mosaic

mosaic framed art

Remember being forced to take that beginner’s art class in highschool and having to painstakingly put together a mosaic? Well, that was then and this is now. You need a colorful art piece to splash up your living room, kitchen, bedroom, or even office – and we’re here to tell you that not all mosaics are as aggravating as your high school art projects. In fact, this geometric mosaic is simple, inexpensive, and tons of fun!

What you will need: canvas or canvas board, ¼” or ½” painter’s tape, paintbrush, and a lively paint color!


Follow these five steps to complete your very own geometric mosaic (that doesn’t look like it was made in high school art class):

  1. Measure out an appropriate size for the desired space.

Where is your finished piece going to hang? Does it need to cover an entire wall or just a select space between two windows? Once you have the perfect place in mind, measure out the desired dimensions and then go in search of an appropriate canvas. Canvas board may be less expensive, but keep in mind that it can warp in humid climates, especially if it’s a bigger size. Be willing to accept slightly different dimensions than you’ve measured if you are on a budget.


  1. Tape your canvas.

Now for the creative part! The next three steps will determine what your art piece looks like in the end. It starts with taping your canvas. Lay lines of ¼” or ½” painter’s tape across the canvas in various directions, criss-crossing and creating many different angles and geometric shapes. Make sure each piece of tape extends to the edges (meaning the ones at a diagonal will be much longer than the rest).


  1. Block out select geometric shapes.

Depending on how you lay your tape, you may have dozens upon dozens of distinct shapes – from triangles to pentagons. Choose anywhere from one to five of these that will remain white and unpainted for contrast. Mark them with a small piece of tape or another type of marker such as a penny.


Choose a paint color that accents the soon-to-be decorated room. Does it already have a color scheme? Work with that. If it’s bland so far, spice it up with a bold red or daring purple! Need something more peaceful? Sea foam green and robin’s egg blue are popular choices as well. Paint each unmarked contrast space with your chosen color.


  1. Allow to dry.

This is probably the most difficult part of all – waiting. It shouldn’t take too long to dry, but be certain that it is before lifting the tape or your color might bleed into the white regions.


  1. Untape and voila!

Slowly peel back each strip of tape. Then step back and admire your not-so-high school handy work!


Now that you’ve revisited an old high school antagonist (the mosaic), it’s time to hang your artwork up for the world to see! But before you grab a hammer and nail, don’t forget the frame! Take your modern geometric mosaic into Frame Warehouse and the experts there will help you finish off your project with a frame that accents your art as well as your home!

Design Your Own Art Mat

photo mat

Art mats can be a costly addition to finish off your art piece or accent that perfect photograph of you in the Bahamas. Wouldn’t you much rather put money toward a unique frame? Instead of having a mat professionally cut, consider making your own. Taking a little extra time to cut and design your own mat will save money and come out with a terrific end product.


For this tutorial, we are going to take you through the steps of cutting a straight-edge mat. If you are interested in a chamfer-edged mat that diagonally slices through the mat board to give a small white border, you should buy the mat pre-cut and skip ahead to step 4.


  1. Decide on the style of mat.

The style of mat is not just a decision between straight and chamfer edges. It is also a decision about whether or not your mat overlaps the art. Most artistic pieces need to be shown in the entirety, but a photograph may be an exception to that. If you are leaning toward overlapping the piece more than a fraction of an inch or only on one or two sides, try cutting the photograph itself down instead.


Mat board comes in many colors and textures. For this tutorial, color and texture is not important because it will be covered up. However, size is important. If your piece is only 3×4” you probably don’t want a mat board of twice that size. If in doubt, buy the larger size and be prepared to cut it down.

  1. Measure your art piece or photograph.

Use a ruler to measure out the length and width of your art piece or photograph. Center these measurements in the middle of the mat board and make pencil marks to map out the square hole you will be cutting. In this case, you can draw on the front of the mat board. However, if you were cutting a colored mat to use as is, you would want to make your markings on the back of the board.

  1. Cut the mat board accordingly.

Place the ruler along the marks or line you made indicating where to cut. Slowly cut along the lines using an exacto knife and guiding with the ruler. Be careful to keep the blade of the knife vertical so that each cut is straight into the board and not at a diagonal.

  1. Add a personal touch.

Once you’ve cut your mat board to the appropriate size for your art, it’s time to add something that will make it unique! Tear up newspaper, book pages, music sheets, or even magazine pages and arrange the pieces of varying sizes across the mat board. Once you have enough spray the board underneath with adhesive, replace the torn pieces and press down firmly. Note: It’s okay if the torn pieces have edges that overlap the mat. You can trim down those rough edges to finish out your trendy and modern mat!

You’ve not only found an amazing art piece or photograph, you’ve now also designed a personal mat! All that’s left is a frame to complete your vision. Take your art and designed mat into Frame Warehouse and the professionals there will fit the perfect frame that will have your friends “oohing” and “ahhing” about the custom piece on your wall.


DIY Postcard Collage

DIY postcard collage

Does your sister travel the world and send you postcards of all sorts of amazing, exotic locations? Or perhaps you yourself adventure cross-country to tour historic American cities and collect postcards as mementos along the way?

Deltiology, or the collecting of postcards, is thought to be one of the largest global hobbies. The postal card idea originated in Germany around 1865 and quickly caught on as being a less expensive way to keep in touch, even if there was a small loss in privacy. At the same time, envelopes in America were being decorated with music notes, comics, or valentines. These “patriotic covers” recognized the same idea.

Passing language barriers and cultures, a postcard memorializes a meaningful locale to you or to be shared with loved ones you wish were there with you. It’s a quick and easy way to remind someone far away that you care, for only a few pennies. But what do you do with them once they are collected or received? Make a postcard collage of course!

A postcard collage is fairly simple and can look pretty snazzy up on an otherwise boring wall.
Follow these steps to build your DIY postcard collage:


  1. Pick out 5 or 6 of your favorite postcards.

This is a good starting point to determine around how big you want your collage to be. Plus, you probably have a number of them that are more private or have wear and tear damage that may not show as well. The most cohesive collages have a theme that goes beyond “Cities I’ve Visited.” Maybe you enjoy postcards which feature mountain ranges or cathedrals. No matter what your theme, be sure that you are comfortable adhering them to something (meaning you will not be able to read any message on the back).


  1. Plan a suitable background.

Colored poster board works well as a sturdy background, but colors may be limited. There’s nothing wrong with using a plain white or black background if your postcards can be seen clearly against it. If your postcards already have bright colors, this might be the way to go. If you are opting for postcards with landscapes, a light shade of clover green or caramel brown might be a nice accent.


  1. Arrange postcards on background.

This is the most complicated part of the process, but it’s not complicated at all! In order to see the color of the background you’ve chosen, there are two options for postcard arrangement. One is by leaving a “frame” of color around/between the postcards. To achieve even borders, use a ruler. If you want a slightly less square design, stagger your postcards in a checkerboard pattern with touching sides. Instead of colored borders, the postcard collage will have small squares of color peeking through.


  1. Adhere postcards with spray adhesive.

Once you’ve determined an arrangement that suits your tastes, pick up a postcard and turn it over on a sheet of newspaper. Spray the back with adhesive and replace it on the colored background, pressing down firmly for 5-10 seconds. Proceed with each postcard this way until all are adhered to the poster board.


Depending on how many cards and which arrangement you choose, the size of your finished piece could vary greatly. Before trimming down the extra edge space on your poster board (if there is any), take your postcard collage in to Frame Warehouse. The staff at Frame Warehouse will be glad to help you pick out the perfect frame – fit and all! Next time you have guests over, use the collage as a conversation piece to share the stories of your travels!

DIY Map Monogram

DIY Map Monogram

Traveling to some far distant city, state, or country can happen in a whirlwind that leaves you breathless and wanting to go back immediately. There were so many things left undone and places unexplored. You try to take some of the magic back home with you in the form of souvenirs and photographs, but there is something missing. You need some representation of the place itself – a map. Looking at a map, you can remember where you traveled, the routes you took, and the landmarks seen. Why not transform your excitement for those fond memories into an art project?


A map monogram is the perfect way to share your adventurous spirit with all those who enter your home, office, etc. For this DIY project, you will need a monogram, a printed map of the chosen location, paint, scissors, glue, and painter’s tape.


  1. Gathering Supplies

The supplies needed for this project are not difficult to find. Most of them are available at your local arts and crafts store, if not your home.

  • The monogram should be a 3D foam, wood, or board cutout of the first letter of your name. (If you want, you could create a series of map letters to spell out your name.)
  • Paint can be any color and medium type from house paint to acrylics. Be sure to inquire to a salesperson if the paint will apply to the material of the monogram, or test it out yourself on a similar material.
  • The map may need to be printed off of a larger digital printer than what you may have at home, depending on the size of the monogram. It should be large enough to cover the entire letter.


  1. Painting the Monogram

You need not paint the entire monogram, only the sides of the letter. The map will cover the entire face. For something a little more complex, you can add horizontal or diagonal stripes to the sides of the monogram. Accomplish this by laying painter’s tape across the monogram prior to painting. When the paint is dry and the tape is removed, there will be a pattern of alternating white and colored stripes.


  1. Preparing the Map

If you have traveled to the location on your chosen map, you can personalize it with stars, stickers, highlights of the routes taken, etc.


Lay the map face down on a flat surface. Set the monogram face down on top of it. Is there a certain part of the map you definitely want showcased on the letter? Make sure the monogram covers it. Remember, the monogram does not need to be centered over the map.


Trace around the edges (and inside edges) of the letter. Cut out your traced map piece and make sure it matches the monogram.


  1. Adding the Map to the Monogram

Apply glue or spray adhesive over the face of the monogram, being careful not to expose the painted sides. Gently lower the map piece onto the glued face of the letter and, when it is centered, press down firmly. Allow to dry.


A map monogram is a unique way to commemorate a fun travel experience; it’s like transferring part of your scrapbook to a wall of your home. Adding some photos to the same wall can enhance the story told by your art project. Of course, those photographs will need great frames to accent your piece, so bring them into Frame Warehouse to find the perfect fit!

Thumbtack Art

thumbtack art

Everyone enjoys repurposing office supplies for the sake of art, and who hasn’t played with thumbtacks on the office idea board? Thumbtacks are actually a very versatile art medium, able to recreate art as complicated as a portrait or landscape through the theory of pointillism. Pointillism uses small dots of color and apply them to patterns that form a larger image.


While some artists choose to paint the heads of the thumbtacks specific color shades for more complicated pieces, our thumbtack art will require much less intricate detail while still maintaining that modern art flare. The following steps will help guide you in creating a one-of-a-kind thumbtack art design:


  1. Choose the Right Supplies

While you can use thumbtacks with tall, plastic heads, we recommend finding the kind with flat, metal heads instead. Metal thumbtacks are easier to work with and more durable. They will ensure the longevity of your design. In addition, metal thumbtacks have a subtle antique aesthetic that plastic thumbtacks lack.


A box frame canvas is likewise recommended for this project, as you will be reinforcing the back with cardboard. In the case of adding color to your canvas, you will also need spray or acrylic paint.


  1. Build Your Design

This is the most important step in the creation of your art piece. Sketch your design onto a piece of paper that is cut down to the exact size of your canvas. Graph paper is nice to use if your design includes words, as it can ensure level and same-sized letters. Cursive and foreign characters work especially well. If you are more artistically inclined, sketching a picture is also okay. Be aware that you will be replacing the lines with thumbtacks, so any kind of shading or more intricate lines may be difficult to convey. Simplicity is key.


  1. Prepare the Canvas

Your thumbtack design may look best on a white, unaltered canvas. However, it is more likely that a little bit of color will enhance your overall design. Consider what color your thumbtacks are; just about any color will work with silver or gold metal thumbtacks, so choose your favorite color or the color that goes best with your current decor! After you have chosen a color, spray paint your canvas and allow to dry. If you would prefer, you can paint the canvas with acrylics instead.


Reinforcing your canvas requires enough cardboard (in pieces or as a whole) to lay across the entire back surface of the canvas. Adhere the cardboard with brown packing tape or blue painter’s tape, whichever is available to you. This will give the thumbtacks something more sturdy to grip than the canvas alone.


  1. Imprint the Design

Lay your paper sketch over the top of the painted canvas. Secure it in place and use pressure to retrace the lines. The pressure will create an imprint in the canvas. The imprint doesn’t need to be easy to see. As long as you can follow the lines, the imprint is strong enough.


  1. Make an Impression

Remove the paper sketch and start tacking! Press each individual tack into the line impressions formed on the canvas, as close as they can be without touching. Don’t press them in too hard or the stretch on the canvas might “erase” the rest of your impression. Instead, wait until all of your design is tacked before ensuring they are pressed in firmly.


Way to harness your industrial art side! Now, it’s time to hang up your finished piece in your home or office. But before you do, consider Frame Warehouse for the perfect frame to showcase your work!

Lip Print

lipstick art

Sure, you’ve heard of leopard print and zebra print designs – but what about lip print? It’s far more unique and striking than your standard animal prints. After all, women are the most dangerous and exotic animals in the world. And what better way to add some sexy spice to your dorm room, bathroom, or even a salon?


For this art project, you will need a canvas or paper background, your favorite shade of lipstick, and most importantly – YOU! Feel free to invite friends. It’s a great sleepover or bachelorette party craft. And guys are welcome to join in, too!


  1. Choosing a Background

Depending on your budget and what you might already have at your disposal, you can choose any material for a background that you desire. Canvas board will hold up the best, but white paper will make the lipstick color pop more. If you use a simple piece of printer paper, you can test out a bunch of different colors and patterns at little expense to you. In fact, even if you choose to use canvas, it’s recommended to test out your lip print on the printer paper beforehand.


If you want to try something a bit less typical, purchase a sheet of clear plastic to use as a background in combination with a glass frame. That way, the color of the wall behind the lip print will be the backdrop for your creation. It will look as if you have kissed the glass frame or wall directly.


  1. Discovering Your Color Palette

Color is key. A lip print piece is ideally a bright and spunky design. Choose a background color that suits the lipstick color of choice. If you choose to apply multiple lipstick colors, make sure that all of them are complementary. The best result may arise from shades of the same tone. For instance, “blazing red” and “flaming orange” might suit each other in theory, but not on paper.


If utilizing a canvas, paint your chosen background color on the canvas and allow to dry. If utilizing paper, you should be able to find paper of your color choice. Black is not recommended. White or pastel pink works really well.


  1. Puckering Up

“Put your lips together like this and kiss.” – Sebastian from The Little Mermaid


Now for the fun and flirty part! Apply your lipstick a little bit thicker than normal. Instead of blotting the excess, pucker up and kiss your background canvas or paper. You may have to re-apply the lipstick after one or two kisses. You can choose to apply your lip print in a systematic pattern and try to make each kiss identical across the page; you can create chaotic spiraling patterns; or anything in-between! Give it to your honey or keep it for your own boudoir.


Once you are satisfied with you final lip print design, it’s time to clean up your materials and head to the store for a frame. Whether you need a simple frame or a transparent glass frame for your lip print, Frame Warehouse has the expertise to finish off your art project! Just remember to clean off the excess lipstick on your lips before you make the trip.

Displaying Musical Instruments

Guitar framing

There are many reasons you might want to display a musical instrument in your home or office. Perhaps your office itself is a music studio or maybe you are a band teacher at a local school. Did you or someone you know have a musical career? Do you proudly collect priceless musical treasures throughout history? Has music touched your life in a way that can only be expressed with a cherished piece of art?


If you desire to display your personal musical instrument or memorabilia for any space, take a look at the following tips:


  1. Consider the Space

Framing a whole musical instrument such as a guitar or trumpet might strike you as a fantastic idea, but this kind of project requires the right space. Unlike a painting and most other framed art, an instrument is 3-dimensional and can be very large. The framing of the piece may require something that looks more akin to a box than a typical flat frame. With that in mind, a music studio or small office may be better off with something smaller or flatter.


If you believe the piece will fit, experiment with the idea of wall placement. For instance, hanging it over a seating area or near a door at head height may cause your art admirers to sustain concussions.


  1. Fit the Purpose

Is the final piece for you or someone else? What is the decor of the chosen space where it will hang? Will you ever want to play the instrument again?


Framing something of an instrument’s magnitude and dimensions is more complex than framing canvas, etc. While a frame can be taken apart, a custom frame will not be as compliant. The instrument or memorabilia to be framed will not be accessible for everyday use. At the same time, it will be much better protected from dust, moisture, etc.


  1. Is Less Truly More?

While the idea of framing a whole musical instrument can be unique and beautiful, you might realize that it is not practical in the provided space. Or, if it’s a gift, you may not know if the recipient has the space for it either.


A great alternative to framing an instrument is framing a piece of one, something to represent the larger whole. For instance, instead of framing a whole guitar, you could frame and retire a few of your favorite picks. Instead of framing a snare drum, you could frame a pair of crossed drum sticks. You could get more creative with this idea, arranging the sticks, picks, strings, or a combination of musical instrument components into your name or the name of your favorite band.


  1. Matting Design

The mat behind the instrument or design should compliment the spirit of the piece. A contrasting background can enhance the 3-dimensional nature of the instrument. Black and white mats are sharper and more professional, but colored options bring more character to a boring wall. Another mat option is to use musical score paper.


  1. Plaque

If the musical instrument or memorabilia holds some significance, consider having a small plaque engraved with the instrument brand, who played it, what year or band, and any other way it’s significant. This way, admirers will know its story and meaning.


After you have assembled and arranged the pieces (musical instrument, mat, and plaque), all it needs is the perfect custom frame. Take the project into Frame Warehouse for a professional mounting and framing service. The experienced staff can help you complete your note-worthy vision.

Framing Considerations

framing

Choosing a frame for your favorite new piece of artwork can be a challenge. With thousands of choices, it may seem overwhelming at times. At Frame Warehouse, our knowledgeable staff are available to help you choose the perfect frame for your next photo or painting. Professional framers can help guide you through the process and you’ll leave knowing you’ve picked the perfect frame to compliment the artwork, your decor and your budget. These three aspects of the framing decision are addressed during the process. Learn more about how Frame Warehouse can assess and provide the best framing experience possible below.

  1. Artwork: The first thing to consider when choosing a frame for your newest piece of artwork or photo is the content in the artwork. From a contemporary black and white photo to a more traditional oil painting, a frame can compliment and enhance a piece. The experts at Frame Warehouse have the knowledge and experience to help narrow down the search to make choosing a frame a simplified process.
  2. Decor: Determining what room a piece will hang in will help to determine the aesthetic feel of a frame as well. Of course, the content of a piece will also play a role in it’s placement. From dining rooms and kitchens to bathrooms and family areas, different feels will determine not only the types of work but the look of the frame as well. Already have a style of frame in mind? Let our professional frame makers know and we will work to find frame options that compliment your current look and feel.
  3. Budget: From high end to more modest pricing options, Frame Warehouse has a wide variety of frames for all budgets. Share this information with our professional framers and they will work with you to find frames that are both beautiful and affordable.


Looking for an entire room of framed artwork or just a piece or two? Frame design consultants can help you choose the perfect frame and can also assist with custom frame design using the wide variety of inventory at each Frame Warehouse location.

A piece of artwork’s frame can bring new look and a completed feel to the piece and the room it resides in. Bring out the best in your art, photography or memorabilia by visiting the framing professionals at one of our 16 Frame Warehouse locations. Each location is staffed with experienced, professional craftsmen and women ready to help you finalize your next framing project and complete the look and feel of your home. Find the location nearest you, here.