3 Reasons to Frame NYE Resolutions

framed quotes

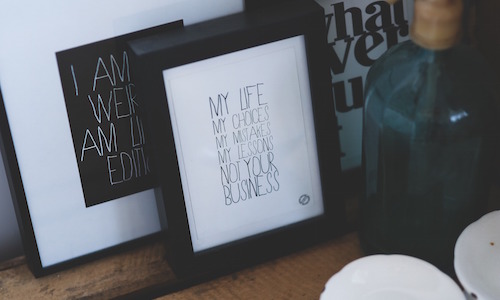
New Year’s Day marks a fresh start. It is a day where people create long-term goals, make plans for the future and create solutions to better themselves. The new year brings great motivation for change, but it is hard to hold onto the motivation for the entire year. Many give up on their resolutions by February. Don’t let that happen to you! This year, on New Year’s Day, declare your resolutions to family and friends and frame your New Year’s resolutions.


Family Activity

Families are always looking for fun things to do together. Instead of spending the first day of the New Year watching a movie, you could make framing New Year’s resolutions a family tradition.

  • It is a great way to chat with your spouse and kids about their goals and interests. This activity opens up the opportunity for you to talk about supporting each other’s resolutions and goals. For example, if you want to eat healthier, it’s a good opportunity to talk to your kids about what kind of healthy foods they like and how you will be modifying normal eating habits. Talking about your resolutions with your family is a great way to solidify them.
  • It’s fun! Family activities are fun. You have a chance to get crafty! Lay out a variety of frames, stationery, and markers so you and your family can write down your New Year’s Resolutions. After you’ve all created your lists and framed them, your family can help you pick a good place to hang them in your home.


Extra Motivation

  • Without a doubt, seeing your New Year’s resolutions framed on the wall will keep you motivated. You will be reminded each day of your long-term goals, which will help you stay on track all year round.
  • People who visit you will see your wall. Your framed resolutions can be a conversation starter. The more people who see your resolutions and hear about them, the more likely you will want to commit to your goals for the long term! Prove to everyone that you can stick to your New Year resolutions, not just through February, but through December!
  • You’ll be able to support your family’s New Year’s resolutions. The framed resolutions will be a reminder about how you can help you family reach their goals.


Accent

Frames are a great way to accent your home decor and add flair to any room. Framed New Year’s resolutions are an excellent way to add personality to your home.

Frame Warehouse is a great resource to help you find the best frames for your home. Contact us today or visit one of our 16 locations!

 

Holiday Crafts for Kids

holiday crafts for kids

With holidays approaching quickly, events with family and friends seem to be happening all the time. You may be hosting one of the coming holiday events! You want to host a successful event where everyone has a good time and enjoys their visit. Think about most holiday events for a moment. There are always adults that are mingling, chatting, and munching on appetizers. Then there are kids that are either bored and sitting against the wall, kids that won’t leave their parent’s side, and kids with so much energy that they’re bolting around the house with just a little too much enthusiasm. This holiday season make a craft for the kids to enjoy! With a fun holiday craft, the adults will have the opportunity to mingle and visit, and the kids won’t be bored waiting for their parents to take them home. It’s a win-win. Here’s how to make the perfect photo frame craft for kids!


Photos

Kids love photos. They have grown up with cameras on cell phones, tablets, Nintendo DS, their computers, and their iPads. They have apps like Instagram and Snapchat. Have they ever used a Polaroid? Or digital film? Probably not!

  • The first step in the photo frame craft is finding a way for kids to take photos. They don’t necessarily need to print right away, but that is part of the fun. If you have a Polaroid and are willing to use some film, that is a great way to engage the kids in a unique craft project!
  • Another option is to purchase a few disposable cameras and set them up for the kids. They are inexpensive, different than using a phone, and will be fun for the parents and kids to see them developed! Plus, you can have them go around the holiday party and take pictures of guests and start some fun conversations.


Frames

This is the fun part. Pick up a variety of frames! Frame Warehouse has over 80 options online. Pick up some decorating tools, like holiday-themed decals and stickers, some holiday colored permanent markers and anything else you think would be fun. Then, let the kids at the holiday party create custom picture frames for the photos that they’ve taken from the evening! Another idea is to get miniature picture frames. These can become Christmas tree ornaments for a seasonal decoration.


We hope you enjoy the holiday season! Enjoy the time with family and friends and reminisce on the past year. Implement this holiday craft for kids to keep them entertained and to create a fun memento of your holiday party!


Tips for Decorating Your Halloween Party

Tips for Decorating Your Halloween Party

It’s October! It is time for pumpkin spiced lattes, apple picking, pumpkin carving, hayrides, and Halloween parties. Decorating for a Halloween party can be difficult! You need to have an element of scary and an element of fun, but avoiding looking too juvenile. We have just the tips to help you throw the perfect Halloween party.


  • Photobooth

A photo booth at any party is a hit, but especially at a Halloween party. People are only in their costumes for one night. They planned, prepared, and created the idea. Everyone wants to take great pictures of their Halloween identity.

  • DIY Photobooth

You do not need to rent a photo booth to have a great party. You can make your own! On a blank wall, create a spooky Halloween themed background. You can use ornate frames to add an old mansion feel. Drape fake spider webs around the frames to create an abandoned haunted house effect for the background of the photo.

Grab your digital camera. Set up a tripod. Set the timer on the camera. Now everyone can take photos of their costumes in an awesome Halloween-themed “photobooth!”

  • Frame Instructions or Activities

Another great way to add flair to your party is by framing instructions and activities. Following the same idea as the photo booth, use ornate frames that have a rustic, haunted mansion look. Drape them in spiderwebs or paint them black to add the right spooky aesthetic.

You can frame the menu of food you’re serving. You can frame Halloween-themed cocktail recipes at the drink table. You can also frame instructions on how to use the photo booth!

  • To-go Gifts

Another option is to give away frames in your party gift bags for people to frame the photos they took in your photo booth! It’s a unique and great way to remember the party.

  • Activity

If your Halloween party is kid friendly, you’ll want an activity for them. Pumpkin carving is fun, but it requires supervision and can be very messy. Don’t stress about that. A different activity option is frame decorating! Have the kids decorate frames with Halloween-themed stickers, autumn colored puff paint, and permanent markers. It’s a great way to get them involved in the atmosphere and keep them entertained during the evening while the adults mingle!

With these decoration ideas from Frame Warehouse, you’ll be setting yourself up for an exciting and memorable Halloween party!


Best Ways to Frame Your Children’s School Photos

frame school pictures

School season is upon us. That means school shopping for pencils, notebooks, binders, crayons, folders, backpacks, shoes, clothes, and so much more. It really feels like the list of back-to-school supplies is endless! We have one more thing for you to add to the list: picture frames for your children’s new school photos! School photos are a great way to make your house a home and your kids will like seeing their school pictures up on the wall. We have some tips on the best ways to frame your photos!


Pick the Right Wall


School photos make any home feel more like your home. Where do you want your photos to be hanging? Do you want them in the entryway where people will see them as they walk in? Do you want them in the hall to add life and color to a formerly empty space? The best place for school photos is an open area, with a neutral color wall, so that the bright faces of your children will get all the attention they deserve.


Pick the Right Frame


There are a lot of frame options when it comes to school pictures. You can find simple, neutral frames that will blend well with the interior decor of your home. You can find themed frames that represent your child’s school or the sports they participate in. If you want to highlight their growth throughout the years with each school picture, you can purchase frames that hold smaller prints of all their prior school photos, while highlighting the most recent school photo.


Decorate


Once you have picked the frame, consider how you want to decorate it. A neat idea is to add decals or mementos that represent the interests that your child pursued that year. Maybe in 6th grade your daughter started playing basketball; you can add a little basketball sticker to the frame. Maybe your son participated in band during his freshman year of highschool; you can add a music note decal to his frame. Doing this will be a nice way to remember when your children picked up different interests in life and how they impacted their future! Your daughter could grow up to be professional athlete and you’ll look back at your frame and remember her starting out as a 6th grader on the basketball team.


Another idea is to paint a smooth frame in “blackboard” paint. Then your children can write down their favorite memories of their school year on their picture frame. This is a nice way to be able to look back on the memories throughout their school career! This can also be done using any plain colored frame with a smooth texture and a permanent marker.


With these ideas for school pictures, Frame Warehouse can help you create or select the best frame to show off your child’s winning smile, all while adding to the atmosphere of your home.

Foiled Again! Coloring Book Pages Transformed

tin foil art

When you were younger, did you ever have a tradition of coloring with your relatives? There’s something simplistic and upbeat about coloring book pages that brings family together to do art. No stress. Minimal mess. A myriad of colors. Even if you feel that you’ve outgrown your days of Crayola and juice boxes (or if your child recently has), you need not throw out those old coloring book pages!

In this tutorial, we will go through the step by step process of transforming those whimsical coloring pages into unique pieces of art.

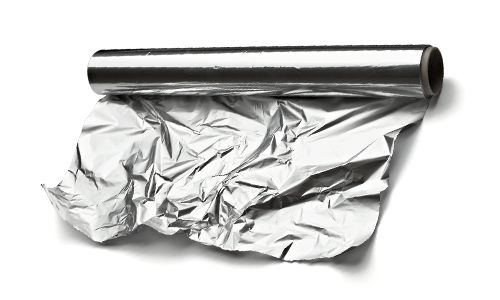
What you will need: coloring book pages (colored or uncolored), marker, cardboard, glue (both tacky and glue stick), tin foil, dull pencil, black shoe polish


  1. Choose Your Image – We recommend the use of coloring pages for ease of the project, a recycling of unused pages, and the added reminiscence of childhood! However, you can draw your own simplistic image if you prefer. It’s important that the image has ample negative space.


  1. Darken Outline – Trace over the image lines with a marker, especially if constructing the project with younger artists. It clarifies the true image that will show through in the end.


  1. Transfer Image to Cardboard – There are a few options for image transfer. 1) You can simply redraw the image onto a piece of cardboard of the same size. 2) Paste the coloring page onto the cardboard with the image facing up. 3) Trace the image on the back of the coloring page. The marker lines will have probably bled through as a guide. Then lay the page on the cardboard face-up and trace over the lines again, with enough pressure to transfer the graphite from the pencil lines on the back onto the cardboard.


  1. Apply Tacky Glue – This step is best handled by an adult. Trace the lines of the image with a thick stream of tacky glue. Try to make the lines as smooth and accurate as possible.


  1. Allow to Dry – The tacky glue needs to dry prior to the next steps. It doesn’t matter if it dries clear or white, as it will be covered. Just ensure that it dries as a raised ridge of glue.


  1. Wrap Foil Over Image – Rub the image down with a glue stick and lay a large piece of foil over the top. (Dull or shiny side – the choice is yours!) Flatten it down to the image using a piece of cloth and fold the excess foil around the edges. Avoid touching it too much. Oils might adhere to the foil or stick as you are pressing, causing your foil to rip.


  1. Press Down to Accent Glue Ridges – Use a cotton ball to gently rub the foil against the glue ridges beneath.


  1. Decorate Negative Space – With a dull pencil, trace patterns into the negative spaces of the foil (ie between the ridge outlines).


  1. Rub Shoe Polish – Rub over the whole foil image with black shoe polish. Leave for a few seconds before wiping back off. The result will be an antiqued silver look.


This foil art project is terrific for the whole family, just like the good ol’ days of coloring. But instead of hanging the finished piece up on the fridge, you can frame it and hang it on the wall! Frame Warehouse can supply you with the perfect accent frames to display you and your child’s beautiful foil designs.

Preserving the Holiday with Pressed Poinsettias

pressed poinsettas

Looking for a classy and unique way to display holiday cheer in your home? Garland, twinkle lights, baubles, and ornaments all have a sort of iconic charm that whisper of fond Christmas memories. And for many of us, Poinsettias carry that same holiday spirit – something about the bold but soft red petals and star shape.


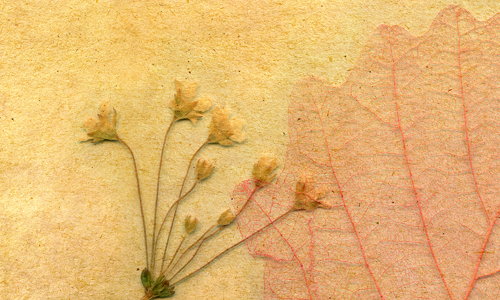
For this DIY project, we’re going to take a look at how to press flowers. In this case, we will use Poinsettias, but any flower can act as the subject of this project any time during the year! Read ahead to learn four pressing methods that can preserve the look of the classic holiday flower and turn it into an art piece.


  1. Heavy Book – Dictionaries, encyclopedias, and Harry Potter books work well for this pressing method. However, the moisture from the flower can damage the book by warping, wrinkling, or tinting the pages. So be sure that the book you use is one that you don’t cherish. That being said, attempt to avoid moisture damage by utilizing four pieces of blotting paper (two on each side of the flower). Arrange the petals as you wish to see them with the flower laid out. Then slowly close the book on the flower, pressing it between the blotting pages as you do so. Switch out the blotter sheets every few days.


  1. Flower Press – A flower press is essentially two slats of wood held together by screws. All you have to do is position the flower between four pieces of blotting paper (two on each side) and insert the gently sandwiched flower into the instrument. If you don’t have blotting paper, colorless cardboard would also work. Tighten the screws to flatten it completely and allow to sit and dry for a few weeks. Change out the blotting paper every few days to speed up the drying process.


  1. Microwave Press – Place the flower between two ceramic tiles, lined with cardboard or of coffee filter paper. There is no need to use blotting paper because of how rapidly the flower will dry. Bind the two tiles together with a rubber band. Microwave for one minute, and then check the flower. If it is not completely pressed and dry, you may continue microwaving in 5-10 second increments. The total time will depend on the type and size of flower. Stop when satisfied.


  1. Hanging Press – Cut two pieces of cardboard to the size of the flower or petals being used. Press them between the two pieces and secure with tape. Punch a hole through the top of the two pieces of cardboard, careful not to punch through any part of the flower within. Tie a string through the hole and hang the press up to dry. A window works well, as the warmth of the sun will help dry it more quickly.


Turn it into Art!

The final step is, of course, turning the beautifully pressed poinsettia into an expression of holiday mirth! There a few ways to accomplish this; but for a flower this size and this colorful, a simple translucent glass frame will do the trick! Get assistance picking out a frame from the frame gurus at Frame Warehouse and then center your pressed flower under the glass. Then hang it up in the dining room as decoration for your family holiday dinners!

Deck The Walls With DIY Holiday Art!

Christmas Art

Remember singing the spirited holiday song “Deck the Halls”? Did you ever wonder what exactly it meant? “Deck” originates from the 15c Middle Dutch word “dekken” which means “to cover.” Over time it has evolved into the more festive “adorn” or “decorate” that we think of today. We say, why not both cover and adorn with some DIY holiday wall art?


The holiday season is full of creative ways to add warmth and seasonal cheer to your home or office. The sheer presence of shiny lights and brightly colored packages encourages the spirit of giving and mirth. So for this DIY holiday art project, it’s time to capture and frame the essence of presents!


Follow the instructions below to design wall art that looks like Christmas gifts:


  1. Gather Materials – Taking stock of your Christmas supplies, you realize that there are a bunch of little pieces that probably can’t be recycled for gifts this year. Leftover wrapping paper. Broken ribbons. Well, good news! This project can utilize both and turn them into something beautiful. You will need:
  • Various wrapping paper prints, ribbons, bows, tags, etc.
  • 4-6 flat board canvases (sizes do not need to match)
  • Glue, tape, or stapler
  • Frames to fit the canvases


  1. Choose Paper and Bows – The most exciting part of wrapping gifts is choosing wrapping paper, bows, and tags. It’s no different with this gift-inspired DIY wall art project. Go crazy and have fun! Mismatched, bright prints will catch the eye and warm the heart! Don’t forget to keep in mind where you will be hanging the final pieces. You may opt for a more limited color palette depending on the color tones already in the space.


  1. That’s a Wrap! – Now that you’ve collected the necessary components and chosen your wrapping paper designs, it’s time to get down to business!


Wrap each canvas with wrapping paper. Just think of it as warming up for the real thing; the only difference is that the wrapping paper needs to only extend an inch or so onto the back of the canvas. Use glue, tape, or staples to adhere the edge of the wrapping paper on the back side. We recommend tape; it’s a tried and true method, after all! Tape also allows the wrapping paper to be removed and reused without tearing, as well as leaving the canvases intact and unaffected.


  1. Matching Frames – For the best effect, we recommend matching black or white frames. You can measure your canvases or take them into Frame Warehouse to get sizing help from a store representative.


  1. Finishing Touches – No present is complete without a bow or ribbon and a tag! In this case, your bow or ribbon will go on the outside of the frame, thus creating a more 3-dimensional gift. Of course, you can add a fancy tag with a name hanging off of the frame, too! Let your imagination dream up inventive gift-themed additions!


While this DIY art project has a definite holiday-theme, it can also be utilized for a year-round decoration. Simply use scrap book paper instead of wrapping paper and leave off the bows! Of course, you will still need frames to really set and striking opposition to the wall. Take a trip to Frame Warehouse to find quality frames to fit your project needs!

Lions and Tigers and Buttons – Oh My!

framing button art

Did you catch our Wizard of Oz reference in the last blog? It was a subtle hint to this great DIY project. Fall is a great time of year for childlike whimsy – and nothing says whimsy quite like buttons! When combined with a holiday theme such as Wizard of Oz or Thanksgiving, you can’t go wrong with this fun art idea.


Chances are that you remember your grandmother having a button drawer or tin when you were little, and it seemed like a veritable treasure trove to dive into and discover all of the colors and sizes and shapes. Buttons haven’t gotten more boring, but they have most likely been overlooked. Buttons that have fallen off of clothes and bags, buttons that have come as extras with clothes bought from the store, buttons that you’ve found – it’s time to turn these lost items into a treasure again!


Follow these steps to build a button masterpiece:


  1. Choose an Image – Choose an image that means something to you and your family, whether it’s a silly turkey, a fall oak tree, an owl, or the Emerald City! You can find the image online and choose to print it off and trace the outline onto a new sheet of paper or outline the image by hand onto any size blank sheet of paper that you want. Once it is traced onto this sheet of paper (poster paper or construction paper works well), carefully cut out the image. The cut-out should be recognizable when placing another contrasting paper behind the first. If it’s not recognizable, you may want to choose a simpler shape.


  1. Button Frenzy! – Go through those odds and ends buttons to select the colors, sizes, and shapes that will peek through the cut-out of your paper. Is your image an oak tree? Choose browns, blacks, and brasses for the trunk and fiery colors for the leaves. Is your image the Emerald City? Pull every green, yellow, and gold button you can find!


Lay a poster board or canvas flat and cover the surface with glue. Use the kind of glue that dries clear to avoid mishaps (especially if you are creating this piece with the kids in your life). Start gluing down those buttons! Press each firmly into the glue starting in the middle and working your way out, leaving as few and small gaps as possible between the buttons.


  1. Fill in the Gaps – There are bound to be gaps between some of your buttons; they are all different shapes and sizes, after all! Try filling the gaps with small beads, glitter, or gems. You can find these sorts of supplies in various craft stores or online for relatively cheap.


  1. Overlay the Image – Cover the back of your cut-out image with the glue and lay it down over the button board. A number of the buttons may be covered or partly covered, but this is okay. The buttons, beads, and other lost items will be seen through the image cut-out in the holiday shape you have selected!


Whether you are passing on the “magic” of buttons on to the next generation or just reliving the whimsy for yourself, this button collage is a great tribute to childhood fun and an inventive way to celebrate the holiday season! Of course, once it’s done, it’ll need a frame to accent and finish the decoration. What better place than Frame Warehouse to seek that last bit of inspiration for the design? With thousands of framing options to choose from, you are sure to find the right touch to button up your artwork!

Melted Crayon Creativity!

crayon art

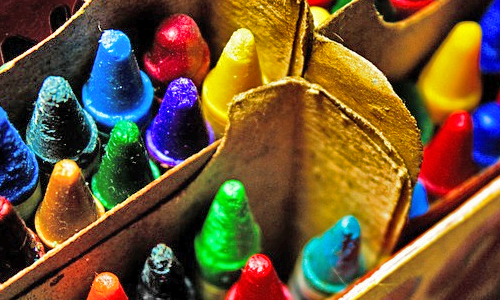
Crayons have long been the go-to art utensil for children around the world. You probably have childhood memories of an open notebook and crayons spread out over a table in no particular way, laying exactly where you threw them down to hurriedly grab another and another. And maybe you even have children or nieces and nephews that bestow you with their masterpieces of scribbled color. The excited frenzy that you see in the art of children and once felt yourself can be relived in a unique DIY crayon art design!


This project is not your typical crayon design on coloring book pages, but rather a more adult version that harnesses the playful energy and creativity of crayons.


What you will need: canvas (any size), basic paint set and paint brush, Crayola crayons, blow dryer

Follow the steps below to create a modern color splash design with crayons!


  1. Gather Materials – Decide on the size of canvas you want, depending on where you plan to hang the finished piece. The size of canvas will be a good indicator of how many crayons you will need; you want to try to cover at least 50% of the canvas with color. The paint can help fill the empty spaces and add to the design, but don’t rely on the paint to be the focus point.


  1. Decide on an Image – Your piece should have a cohesive idea. The idea could be as simple as a color pallette or as complex as an image, such as a tree. Decide where in your image you will incorporate splashes of crayon color. For a tree, the crayon splashes could be groups of leaves – great for the changing fall colors look!


  1. Melt Crayons – Unwrap the crayons you have chosen. Using a fork or tweezers, hold out the crayon over the canvas. Turn the blow dryer on the highest heat and point it downward over the crayon and toward the canvas. As the crayon melts, the color will splash across the canvas. Repeat this with several dozen crayons of varying colors. The splashes can be isolated or overlapping.


  1. Add a Splash of Paint – This is the step that pulls the whole idea and image together. Did you imagine the color splashes as groups of tree leaves? Then add brown paint extending down from them like a tree trunk. If you were just experimenting with isolated splashes of color, you could add green stems and turn them into abstract flowers. Or just play around with paint shapes and outlines over the top of the crayon splashes for a more modern graphic look!


  1. Finish – The crayons must cool in order for the color splashes to harden into place. The paint must also dry. Once enough time has passed, you may choose to add a spray finish to keep the colors from running or smudging further.


Have you been looking for a simple art project for Sunday afternoon? Or maybe you need to dress up your apartment for a showing? This DIY melted crayon design is a fun solution to suit your boredom and decoration needs! And best of all, it’s inexpensive and doesn’t take intensive art skill. Once you’ve finalized the piece and are ready to display it, head over to Frame Warehouse to choose the perfect finishing frame.

Raised Letter Art

creative framing ideas

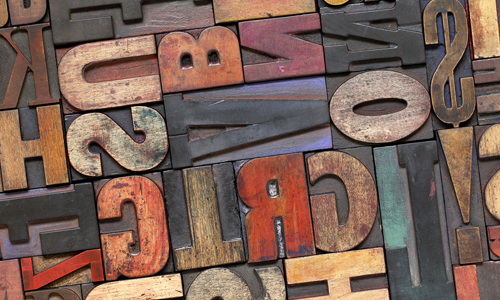
You may remember ABC blocks from your childhood, or perhaps your mother pulls out the photo album each year and shows you an embarrassing picture of yourself stacking them up to create nonsensical words. You have to admit that there was something altogether artistic about the look of stacked and arranged wooden letters, even if they didn’t make complete sense.

Well, now you once again have a chance to play with blocks – letter blocks, that is – and turn them into art! Of course, this time you will be arranging them into words, lyrics, and quotes that are meaningful to you. All you need for this DIY project are wooden letters (anywhere from ½” to 3” in height), canvas, glue, and some kind of paint.

Take these four steps and you’ll have a unique and meaningful 3D art piece in no time!


  1. Choose letters.

Any crafting store will have a variety of sizes and styles of wooden letters. Choose a size that is appropriate to your chosen canvas size. If you are creating a piece that is smaller than a few square feet, you probably don’t want letters over 1” tall. The smaller they are in proportion to the canvas, the more design options and longer quotes you will be able to accomplish.


  1. Plan a design.

This art project is a great opportunity to express your inner poet or simply quote your favorite movie line. In addition to the words used, you must also design the layout. Centered or offset to the side? Curving or perhaps slanting downward? You can even make unique shapes with the words! For instance, you could arrange words like “love,” “friendship,” “family,” “home,” etc. into the shape or outline of a heart.


  1. Paint letters and canvas.

Spray paint, acrylics, or even house paint will work for this project. The canvas and wooden letters need not be the same color. If they are, the art takes on an interesting ghost image effect. If not, the letters can really pop and create a 3D texture in the space.


  1. Place and glue letters.

Finally, after the letters and canvas dry, arrange the lyrics, quote, or word shape on the canvas itself. Then, you will want to turn the letters onto their “fronts” one by one and glue the backs with spray adhesive or wood glue. Turn them right-side up and press down onto the canvas. Once each individual letter is securely in place, you’re done!


One of the coolest aspects of this project is the way the wooden letters pop from the canvas and give it that 3D feel. The wrong frame can flatten the aesthetic look and turn your effort into a common word print. Don’t take that chance! Instead, bring your creation into Frame Warehouse and get expert advice from the framers who care just as much about your final work of art!