5 Tips for Making Your Home Decor Look More Expensive

custom frames

Dressing up your home in the appearance of wealth need not actually empty your bank account. Part of the “expensive” look comes from the skill of interior decorating and some fancy tricks. Want to be let in on the secret? Read on to discover five tricks to dressing up your home decor!


  1. Three is a Magic Number – For some unknown reason, the human brain digests information and takes pleasure processing things in threes. The triptych, a three-paneled piece of art, arises from early Christian artwork and has been established in different cultures throughout the history of the world for this reason. Historically, a triptych was able to be folded in on itself as well as displayed open. However, the revitalized version seen today is a group of three separate pieces of art which depict one scene or subject, usually hung in close proximity on a wall. The history of this device and the human preference for three make this a great method for decorating a space to seem more expensive and cultured.


  1. Expand a Room Without Renovations – Renovations are expensive, and size is generally associated with a higher price tag for that reason. Instead of investing in reconstruction, throw down a large rug and hang a few mirrors. Both of these give the illusion of space and expense. Also, avoid loud colors in everything from decorative throws to frames. Keep it neutral!


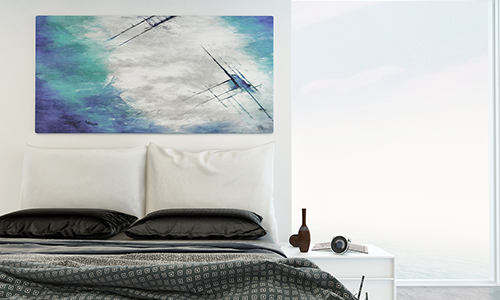
  1. Create a Focal Point – Every room, especially ones frequented by guests, should have a focal point in order to be balanced. The easiest focal point is a large piece of art or art collage on one wall. Try not to overpower the room with multiple walls with large paintings, as it ends up looking cluttered.


  1. Try Textured Wallpaper – In smaller rooms like bedrooms, it’s ideal to create the intention of “cozy” rather than cramped. Applying textured wallpaper on one wall is budget-friendly and adds warmth and personality. Many decorators call this an “accent” wall because it should ideally accent everything else in the space. It also causes otherwise flat pieces of art or photographs to pop.


  1. Add an Element of Surprise – Fancy and expensive aesthetic doesn’t have to be boring. In fact, it’s more often bold. Jazz up a neutral room palate with a pop of unexpected color in an accent pillow or a single picture and frame in a larger collage.


Whether you have family coming into town, love playing hostess, or simply want your home to look top notch on a daily basis, take these decorating tips into consideration! Need a perfect focal point painting for your living room? Want custom frames for a wall collage? Thinking of expanding the size of a room with a mirror? You can find all of these and more at Frame Warehouse, so stop by today!
 

Foiled Again! Coloring Book Pages Transformed

tin foil art

When you were younger, did you ever have a tradition of coloring with your relatives? There’s something simplistic and upbeat about coloring book pages that brings family together to do art. No stress. Minimal mess. A myriad of colors. Even if you feel that you’ve outgrown your days of Crayola and juice boxes (or if your child recently has), you need not throw out those old coloring book pages!

In this tutorial, we will go through the step by step process of transforming those whimsical coloring pages into unique pieces of art.

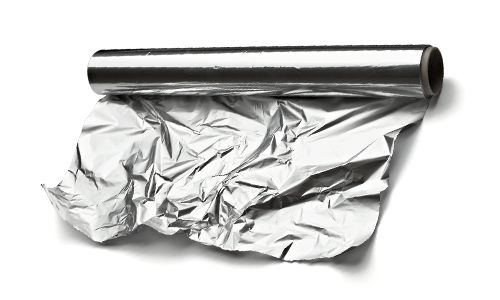
What you will need: coloring book pages (colored or uncolored), marker, cardboard, glue (both tacky and glue stick), tin foil, dull pencil, black shoe polish


  1. Choose Your Image – We recommend the use of coloring pages for ease of the project, a recycling of unused pages, and the added reminiscence of childhood! However, you can draw your own simplistic image if you prefer. It’s important that the image has ample negative space.


  1. Darken Outline – Trace over the image lines with a marker, especially if constructing the project with younger artists. It clarifies the true image that will show through in the end.


  1. Transfer Image to Cardboard – There are a few options for image transfer. 1) You can simply redraw the image onto a piece of cardboard of the same size. 2) Paste the coloring page onto the cardboard with the image facing up. 3) Trace the image on the back of the coloring page. The marker lines will have probably bled through as a guide. Then lay the page on the cardboard face-up and trace over the lines again, with enough pressure to transfer the graphite from the pencil lines on the back onto the cardboard.


  1. Apply Tacky Glue – This step is best handled by an adult. Trace the lines of the image with a thick stream of tacky glue. Try to make the lines as smooth and accurate as possible.


  1. Allow to Dry – The tacky glue needs to dry prior to the next steps. It doesn’t matter if it dries clear or white, as it will be covered. Just ensure that it dries as a raised ridge of glue.


  1. Wrap Foil Over Image – Rub the image down with a glue stick and lay a large piece of foil over the top. (Dull or shiny side – the choice is yours!) Flatten it down to the image using a piece of cloth and fold the excess foil around the edges. Avoid touching it too much. Oils might adhere to the foil or stick as you are pressing, causing your foil to rip.


  1. Press Down to Accent Glue Ridges – Use a cotton ball to gently rub the foil against the glue ridges beneath.


  1. Decorate Negative Space – With a dull pencil, trace patterns into the negative spaces of the foil (ie between the ridge outlines).


  1. Rub Shoe Polish – Rub over the whole foil image with black shoe polish. Leave for a few seconds before wiping back off. The result will be an antiqued silver look.


This foil art project is terrific for the whole family, just like the good ol’ days of coloring. But instead of hanging the finished piece up on the fridge, you can frame it and hang it on the wall! Frame Warehouse can supply you with the perfect accent frames to display you and your child’s beautiful foil designs.

6 Essential Tips for Hanging Frames

hanging frames

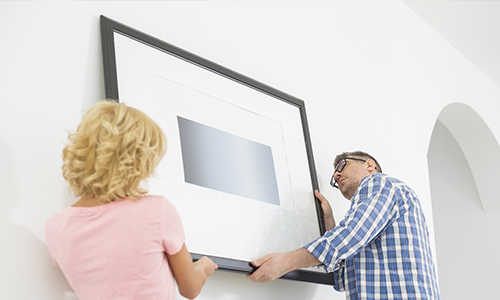
Hanging framed art, mirrors, and photographs is an essential aspect of decorating. For new homeowners, a first time renter, expecting parents, or a business upstart, decorating is also one of the most exciting tasks for building a livable space and making it truly your own! However, when you’re staring down a series of blank walls, it can be a little intimidating. Where do you start? What if you change your mind and have holes in your otherwise pristine walls?

If this sounds like your situation, you could probably use some advice, and that’s why we’re here to provide the six essential tips for hanging frames!


  1. Reconsider Nails – A nail usually functions just fine to support smaller art pieces, mirrors, etc. But consider other options that have a wide balance for the weight, such as screws or threaded anchors. The right hardware now will help prevent tilting and falling later on. Something else to take into consideration is if you are hanging on sheetrock walls, plaster or wood – make sure to do your research before drilling or hammering into the wall!


  1. Create a Template – Everyone does this at one point or another, claiming to be able to eyeball how twelve framed pieces will fit together on a wall and just starting to drill – only to run out of wall space or create a wall full of holes. To save time and a potential headache, create accurately sized picture stand-ins from newspaper and tape them up on the wall. Stand back and rearrange until you are satisfied by the placement.


  1. Eye Level? – The general rule of thumb for hanging a framed piece is to keep it at eye level. However, there are exceptions. Framed pictures and mirrors may be above or below eye level if they are part of a bigger collage of framed pieces on the wall. It’s possible to cover an entire wall this way, making it impossible for every piece to be at eye level. In addition, a framed art piece hung above a couch or other piece of furniture should only be 3-6 inches above. Any more and the eye will be drawn to the blank wall rather than the focal point that is framed. Measure twice, drill once!


  1. Just a Reminder – Have you been a victim of drilling dust and plaster residue littering your carpet from the simple process of hanging a frame? Try folding a post-it note in half and adhering it to the wall just beneath the spot you will drill. The V shape of the note will catch falling dust and debris.


  1. Sore Fingers? – Don’t find out the hard way that you aren’t a good aim! One overly zestful strike and the hammer may come down onto your fingers instead of the nail. Try holding the nail steady with a clothespin. It keeps your fingers at a safe distance while maintaining control over the nail.


  1. Size Matters – Big walls should have big pictures or a grouping of smaller pictures. Similarly, a smaller wall should not be overpowered by a piece that covers the entire wall.


Planning and prepping for the ease of hanging art and mirrors is only half of the battle. The other half is framing! Let Frame Warehouse fight that battle by your side, helping you decide amongst the many options for frame style, material, and color. If you have a collage, you might want to have all of the pieces custom framed to match – Frame Warehouse can do that, too!

Preserving the Holiday with Pressed Poinsettias

pressed poinsettas

Looking for a classy and unique way to display holiday cheer in your home? Garland, twinkle lights, baubles, and ornaments all have a sort of iconic charm that whisper of fond Christmas memories. And for many of us, Poinsettias carry that same holiday spirit – something about the bold but soft red petals and star shape.


For this DIY project, we’re going to take a look at how to press flowers. In this case, we will use Poinsettias, but any flower can act as the subject of this project any time during the year! Read ahead to learn four pressing methods that can preserve the look of the classic holiday flower and turn it into an art piece.


  1. Heavy Book – Dictionaries, encyclopedias, and Harry Potter books work well for this pressing method. However, the moisture from the flower can damage the book by warping, wrinkling, or tinting the pages. So be sure that the book you use is one that you don’t cherish. That being said, attempt to avoid moisture damage by utilizing four pieces of blotting paper (two on each side of the flower). Arrange the petals as you wish to see them with the flower laid out. Then slowly close the book on the flower, pressing it between the blotting pages as you do so. Switch out the blotter sheets every few days.


  1. Flower Press – A flower press is essentially two slats of wood held together by screws. All you have to do is position the flower between four pieces of blotting paper (two on each side) and insert the gently sandwiched flower into the instrument. If you don’t have blotting paper, colorless cardboard would also work. Tighten the screws to flatten it completely and allow to sit and dry for a few weeks. Change out the blotting paper every few days to speed up the drying process.


  1. Microwave Press – Place the flower between two ceramic tiles, lined with cardboard or of coffee filter paper. There is no need to use blotting paper because of how rapidly the flower will dry. Bind the two tiles together with a rubber band. Microwave for one minute, and then check the flower. If it is not completely pressed and dry, you may continue microwaving in 5-10 second increments. The total time will depend on the type and size of flower. Stop when satisfied.


  1. Hanging Press – Cut two pieces of cardboard to the size of the flower or petals being used. Press them between the two pieces and secure with tape. Punch a hole through the top of the two pieces of cardboard, careful not to punch through any part of the flower within. Tie a string through the hole and hang the press up to dry. A window works well, as the warmth of the sun will help dry it more quickly.


Turn it into Art!

The final step is, of course, turning the beautifully pressed poinsettia into an expression of holiday mirth! There a few ways to accomplish this; but for a flower this size and this colorful, a simple translucent glass frame will do the trick! Get assistance picking out a frame from the frame gurus at Frame Warehouse and then center your pressed flower under the glass. Then hang it up in the dining room as decoration for your family holiday dinners!

How to Properly Clean Art and Photo Frames

how to clean frames

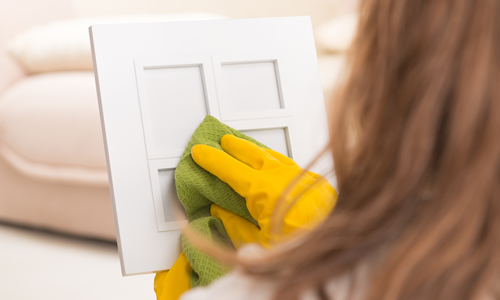
A framed photo or art piece can be the highlight of a room, drawing conversation and attention of guests. It might even captivate viewers enough to accumulate fingerprints. And that’s in addition to the common dust and grime built up over time. So even when you’ve invested in a top notch frame to keep your artwork protected, the inorganic and organic material that interacts with it can react adversely with the frame glazing and break down its protective properties.


Don’t leave the precious pictures and art on your walls unprotected in old frames! Instead, clean your frames regularly with the following steps.


Clean The Surface:


  • Glass – Glass doesn’t require too much fuss. A common streak-free glass cleaner and soft, lint-free cloth will easily wipe away fingerprints and dust.


  • Acrylic or Optium Glazing – Glazing requires a little more care than the typical glass. Use an anti-static acrylic cleaner and a microfiber cloth.


Identify and Clean Frame:


  1. Identify Frame – Wooden, sprayed, gilded, color-washed, or welded? A specific frame type has a specific sensitivity, requiring an alternate method of cleaning. A frame professional at Frame Warehouse can identify your frame for you if you are having trouble.


  1. Choose Solution and Cloth –
    1. Clear, Color-Free Acrylic or Glass Cleaner – Use this combination for sprayed frames. Sprayed frames are probably the least sensitive, and can usually be cleaned with the same supplies at the glass or glazed surface.
    2. Clean, Dry, Lint-Free Cloth – Wooden frames are a bit more sensitive. It’s best not to use any solution to clean wood, unless it is specifically a wood cleaner (and sometimes not even then). The harsh chemicals can break down the organic structure of the wood. Instead, a clean and dry, lint-free cloth will be able to rub the grime away.
    3. Cotton Gloves and Feather Duster – Gilded, color washed, and welded frames all fall into the most sensitive frame category which requires delicate handling. Wear cotton gloves when handling these and whisk away dirt and grime with a feather duster. If you don’t have a feather duster, you may use a soft lint-free cloth. Avoid using pressure.


  1. Spray Solution onto Cloth – Never spray any cleaning solution directly onto the glass, glazing, or other frame elements. Always spray onto the cleaning cloth, letting the air hit the damp cloth for a few seconds before making contact.


  1. Use Small Circular Motions – Wipe the cloth or duster in circular motions.


  1. Continue Movement Until Solution Evaporates – If you are using a solution on a cloth, be sure to continue rubbing until the solution evaporates completely from the surface of the frame.


Even if a frame is cleaned properly, over the course of time it’s recommended to seek refurbishment. Refurbishing or replacing a frame will ensure that the artwork or other precious image displayed inside will stay in top condition. Somewhere between 5-10 years, a frame may start showing wear or be weakened, resulting in less moisture or UV protection for instance. When that time comes, Frame Warehouse can offer you a great selection of frames to replace the old one.

Deck The Walls With DIY Holiday Art!

Christmas Art

Remember singing the spirited holiday song “Deck the Halls”? Did you ever wonder what exactly it meant? “Deck” originates from the 15c Middle Dutch word “dekken” which means “to cover.” Over time it has evolved into the more festive “adorn” or “decorate” that we think of today. We say, why not both cover and adorn with some DIY holiday wall art?


The holiday season is full of creative ways to add warmth and seasonal cheer to your home or office. The sheer presence of shiny lights and brightly colored packages encourages the spirit of giving and mirth. So for this DIY holiday art project, it’s time to capture and frame the essence of presents!


Follow the instructions below to design wall art that looks like Christmas gifts:


  1. Gather Materials – Taking stock of your Christmas supplies, you realize that there are a bunch of little pieces that probably can’t be recycled for gifts this year. Leftover wrapping paper. Broken ribbons. Well, good news! This project can utilize both and turn them into something beautiful. You will need:
  • Various wrapping paper prints, ribbons, bows, tags, etc.
  • 4-6 flat board canvases (sizes do not need to match)
  • Glue, tape, or stapler
  • Frames to fit the canvases


  1. Choose Paper and Bows – The most exciting part of wrapping gifts is choosing wrapping paper, bows, and tags. It’s no different with this gift-inspired DIY wall art project. Go crazy and have fun! Mismatched, bright prints will catch the eye and warm the heart! Don’t forget to keep in mind where you will be hanging the final pieces. You may opt for a more limited color palette depending on the color tones already in the space.


  1. That’s a Wrap! – Now that you’ve collected the necessary components and chosen your wrapping paper designs, it’s time to get down to business!


Wrap each canvas with wrapping paper. Just think of it as warming up for the real thing; the only difference is that the wrapping paper needs to only extend an inch or so onto the back of the canvas. Use glue, tape, or staples to adhere the edge of the wrapping paper on the back side. We recommend tape; it’s a tried and true method, after all! Tape also allows the wrapping paper to be removed and reused without tearing, as well as leaving the canvases intact and unaffected.


  1. Matching Frames – For the best effect, we recommend matching black or white frames. You can measure your canvases or take them into Frame Warehouse to get sizing help from a store representative.


  1. Finishing Touches – No present is complete without a bow or ribbon and a tag! In this case, your bow or ribbon will go on the outside of the frame, thus creating a more 3-dimensional gift. Of course, you can add a fancy tag with a name hanging off of the frame, too! Let your imagination dream up inventive gift-themed additions!


While this DIY art project has a definite holiday-theme, it can also be utilized for a year-round decoration. Simply use scrap book paper instead of wrapping paper and leave off the bows! Of course, you will still need frames to really set and striking opposition to the wall. Take a trip to Frame Warehouse to find quality frames to fit your project needs!

How to Remove Photos From Magnetic Albums

magnetic photo album

Last month, we explained how to best care for aging photos and we mentioned avoiding magnetic albums. But why are magnetic albums so harmful? And what can you do if a magnetic album that houses dozens of irreplaceable, one-of-a-kind photos of your ancestors was passed down into your possession?

You can recognize a magnetic album by its thick paper stock pages with Mylar or PVC plastic covers. Thirty to forty years ago, these were popular as a simple way to showcase photos. To stick a photo between the lightly adhesive pages and sticky plastic covers took a matter of moments. However, it has since been discovered that the glue utilized in these magnetic albums have a high acidic content that can potentially eat away at the backs of photos. Not to mention that the plastic page covers hold in the toxic fumes from the acidic reaction, essentially helping the photos to decompose faster.


Many precious photographs have been completely destroyed by these magnetic albums, so it’s best to remove the photos that remain in these destructive bindings. Follow these steps to do so:


  1. Make Copies and Be Aware – All of the methods of photo removal from magnetic albums have the chance of damaging any writing on the backs of the photos, if not the photos themselves. It’s best to make photocopies of the images that you do not wish to lose.
  2. Lift a Corner – There is a chance that the photographs will come up easily, despite the deterioration and old adhesive. Attempt to gently lift a corner of a photo that means less to you. If it lifts easily, slowly peel the photo up the rest of the way. Keep in mind that all of the photos may not come up in this way, so no hurried movements.
  3. Use Dental Floss – Using unwaxed dental floss pulled taught, slide the floss between the paper stock page and the photo. Saw back and forth gently until the floss can move down the entire length of the photo.
  4. Freezer – Place the entire magnetic album or just a single page in the freezer for a few minutes. Do not allow it to stay in the freezer much longer or condensation on the photos could damage them. The glue should become brittle, allowing for easier removal.
  5. Microwave – Place an individual album page in the microwave for around 5 seconds. Then flip the page over and heat for another 5 seconds. Repeat until the photo seems able to shift away from the page. The heat allows the adhesive to heat up, making the photos easier to remove. But it can also heat the glue up to the point of damaging the back of the photo, so take care not to overheat!
  6. Metal Spatula – A spatula works similarly to the floss and microwave options combined. As you slide the metal spatula under the photo, use a blow dryer to heat the metal and sever the adhesive more easily.
  7. Un-Do – This product is a special adhesive remover that comes with a special tool that directs the solution safely under the photos. However, it is not safe for the front faces of images, so be careful.


Finding photos in magnetic albums is never a good thing, even if they seem in perfect condition. If the removal process is going to take a long time (ie a few days or weeks), it’s best to cut out the plastic covers from the albums and replace with temporary acid-free tissue that can keep the photos separate and ventilated better.


Once your project of removing photos from the magnetic albums is complete, chances are that you’ve found some pretty spectacular images you would like to give special attention to and maybe even hang! Frame Warehouse offers a wide variety of photo frames that are sure to protect as well as display those rescued family memories – just in time to display or give as gifts for the holidays!

Caring for Old Photos

caring for old photos

If a picture is worth a thousand words, it would a shame to lose that story to degradation over time. Unfortunately, photographs (especially older ones) are extremely time-sensitive and delicate. Any number of environmental extremes can break down the chemicals on a photograph, destroying the integrity of the picture. Many images (like those of distant ancestors) cannot be replaced. If photographs are not properly stored, instead of passing down these physical memories from generation to generation, they can become lost.


But there are ways to fight photograph aging and destruction! The first step is knowing how to care for old photos, something that seems foreign to a generation in which photos are captured digitally. Follow these tips to preserve your old family photographs:


Storage Environment:

Photographs should be stored away from moisture and extreme temperature. Basements are not ideal, and anywhere near vents, heating units, or direct sunlight can cause faster photo degeneration as well.


Storage Containers:

Plastic tubs or sleeves are great for storing photos if you can’t get ahold of acid-free boxes. If you are displaying photographs in albums, make sure the pages are acid-free as well.


Worried about photos sticking together? Though it may seem tedious, photographs should ideally be stored with acid-free paper between them.


What to Avoid:

  • Acidic Paper – Why is acidic paper and materials so bad for photos? Acids destroy photo pigment and eventually photo paper. Everything you use to store and display photos should be acid free or “archival quality.”


  • ‘Magnetic’ Photo Albums – The albums your parents and grandparents used that have sticky pages and plastic overlay sheets are equally bad for photograph preservation. Photo backs become eaten away by the “sticky” page and a photograph may eventually stick to the plastic overlay sheet.


Photographs found in these conditions require delicate handling and tender love and care. Keep an eye out for an article next month about how to safely remove photographs from magnetic albums.


With so many great memories and family portraits captured in photographs, you don’t want to store them all – you want to display them! But there are proper techniques to follow for framing, just as there are for storing old photos – techniques like matting a photograph to keep it from sticking to the glass and allow ample circulation. Framing old photos is an art in itself, an art that Frame Warehouse has perfected. The expert framers at Frame Warehouse know which matting and framing materials to use to preserve those precious photo gems!

Lions and Tigers and Buttons – Oh My!

framing button art

Did you catch our Wizard of Oz reference in the last blog? It was a subtle hint to this great DIY project. Fall is a great time of year for childlike whimsy – and nothing says whimsy quite like buttons! When combined with a holiday theme such as Wizard of Oz or Thanksgiving, you can’t go wrong with this fun art idea.


Chances are that you remember your grandmother having a button drawer or tin when you were little, and it seemed like a veritable treasure trove to dive into and discover all of the colors and sizes and shapes. Buttons haven’t gotten more boring, but they have most likely been overlooked. Buttons that have fallen off of clothes and bags, buttons that have come as extras with clothes bought from the store, buttons that you’ve found – it’s time to turn these lost items into a treasure again!


Follow these steps to build a button masterpiece:


  1. Choose an Image – Choose an image that means something to you and your family, whether it’s a silly turkey, a fall oak tree, an owl, or the Emerald City! You can find the image online and choose to print it off and trace the outline onto a new sheet of paper or outline the image by hand onto any size blank sheet of paper that you want. Once it is traced onto this sheet of paper (poster paper or construction paper works well), carefully cut out the image. The cut-out should be recognizable when placing another contrasting paper behind the first. If it’s not recognizable, you may want to choose a simpler shape.


  1. Button Frenzy! – Go through those odds and ends buttons to select the colors, sizes, and shapes that will peek through the cut-out of your paper. Is your image an oak tree? Choose browns, blacks, and brasses for the trunk and fiery colors for the leaves. Is your image the Emerald City? Pull every green, yellow, and gold button you can find!


Lay a poster board or canvas flat and cover the surface with glue. Use the kind of glue that dries clear to avoid mishaps (especially if you are creating this piece with the kids in your life). Start gluing down those buttons! Press each firmly into the glue starting in the middle and working your way out, leaving as few and small gaps as possible between the buttons.


  1. Fill in the Gaps – There are bound to be gaps between some of your buttons; they are all different shapes and sizes, after all! Try filling the gaps with small beads, glitter, or gems. You can find these sorts of supplies in various craft stores or online for relatively cheap.


  1. Overlay the Image – Cover the back of your cut-out image with the glue and lay it down over the button board. A number of the buttons may be covered or partly covered, but this is okay. The buttons, beads, and other lost items will be seen through the image cut-out in the holiday shape you have selected!


Whether you are passing on the “magic” of buttons on to the next generation or just reliving the whimsy for yourself, this button collage is a great tribute to childhood fun and an inventive way to celebrate the holiday season! Of course, once it’s done, it’ll need a frame to accent and finish the decoration. What better place than Frame Warehouse to seek that last bit of inspiration for the design? With thousands of framing options to choose from, you are sure to find the right touch to button up your artwork!

Home Is Where the Heart Is

map framing

Is there a city, state, or even country that claims your heart and has always felt like home? Maybe you live there, or maybe you have a dream to one day move. No matter what this special location means to you, it’s time to showcase it!


Earlier this year, we detailed a step by step process on making a map monogram. This project is a less literal interpretation of that same concept, for those who love travel or simply want to add an interest piece to a bare wall. Without putting a map directly on your wall, it highlights a location in an artistic and abstract way with nails and string.


What you will need: wooden board, paint, skinny nails, hammer, string

Ready for a DIY hardware extravaganza? Follow these steps to construct your very own heart and home map:


  1. Prepare a Board – You may be able to find a wooden plaque or precut board or you may choose to have one cut to a desired size. If you are planning to use a standard printer to print your map outline, try to keep the size of your board between 10 and 14 inches in length and width. It should also be between ½” and 1” thick to accommodate nails without splintering. Once this board has been chosen and sized, feel free to paint it over with a color of your choice. Any color will do – from plain white to neon pink! Just make sure you plan accordingly for whatever room the piece will be featured.


  1. Cut Out Your Map – Print your chosen map. A state or country map works the best for a more recognizable outline. The map details (roads, names, colors, etc.) don’t matter because you will only be using the printed map as a template for the outline. Cut out the map. Don’t forget to draw and cut out a heart shape in the center of the map as well. Or, if you’d rather, accent the specific city or state within the map that means most by cutting out the heart shape around it; it’s okay if it’s off-center! The heart should be 2-3” wide.


  1. It’s Hammer Time! – Position a nail at any edge of the map and hammer it straight down into the board. Be sure to hammer on a hard surface such as concrete, in case the nail punctures through the board. It could potentially scratch or damage whatever is below. Repeat this process until nails outline the entire map and the inside of the cut out heart. Nail heads should almost touch but leave enough room for a string to pass between them.


  1. Remove the Map – Carefully lift the map free from the board. Now you have a map outline from nails!


  1. String the Nails – Choose a color of string that complements the board color. Tie one end of the string to any nail on the outline. Then guide the string to the center heart and circle the string around the nearest nail. The string will then extend back out to the next proximate nail on the outline. After circling around that nail, it will go back to the center heart. (Because the heart will have far fewer nails, more than one outline nail will be connected by the string to a single heart nail.) In this way, the string will create a bunch of inward pointing lines that connect the heart to the state or country outline.


Fall wouldn’t be complete without The Wizard of Oz, and this DIY art construction will have you thinking, “There’s no place like home.” It combines industrial strength and delicate charm for an upbeat conversation piece that will mean something to you for years to come. And if you want to dress it up a little bit more before hanging it up in your office or home, consider choosing one of the great framing selections from Frame Warehouse. The staff at Frame Warehouse can help fit three dimensional pieces like this into a quality, lasting frame without hassle!